Configure when alert notifications should be sent using several scheduling options.
- Open the Alert Entries page.
- Highlight the appropriate Alert Entry and select Schedule.
- The Alert Schedule page is displayed.
| Field | Description |
|---|---|
| Schedule Type | Priority, Immediately, Specific Date or Interval. These are explained further in Schedule Type options. |
| Occur Once | The alert can be set to trigger once only. |
| Immediately | |
| Delay by Date-Time | The delay before distributing the alert. See Entering Duration on how to enter this field. |
| Specific Date | |
| Date-Time Field No. | The field number used to determine the distribution date. |
| Date-Time Field Name | This is automatically loaded from the Date-Time Field No. |
| Date-Time Offset | The distribution of the alert is offset by this duration. See Entering Duration on how to enter this field. |
| Summarise Alert Email | When enabled, any pending emails will be summarised into one email. |
| Internal | |
| Start Date-Time | The earliest date-time for distributing the alert. |
| Frequency | The frequency at which the alert will be distributed. |
| End Date-Time | The latest date-time the alert will be distributed. After this, the alert will not occur. |
| Next Check Date-Time | The next date-time the alert will be distributed. It is automatically updated but may be changed manually. |
| Summarise Alert Email | When enabled, any pending emails will be summarised into one email. |
Schedule Type options
The schedule type sets the behaviour of the alert.
Priority
The Alert will be sent when triggered, ignoring any Alert Recipient Setup.
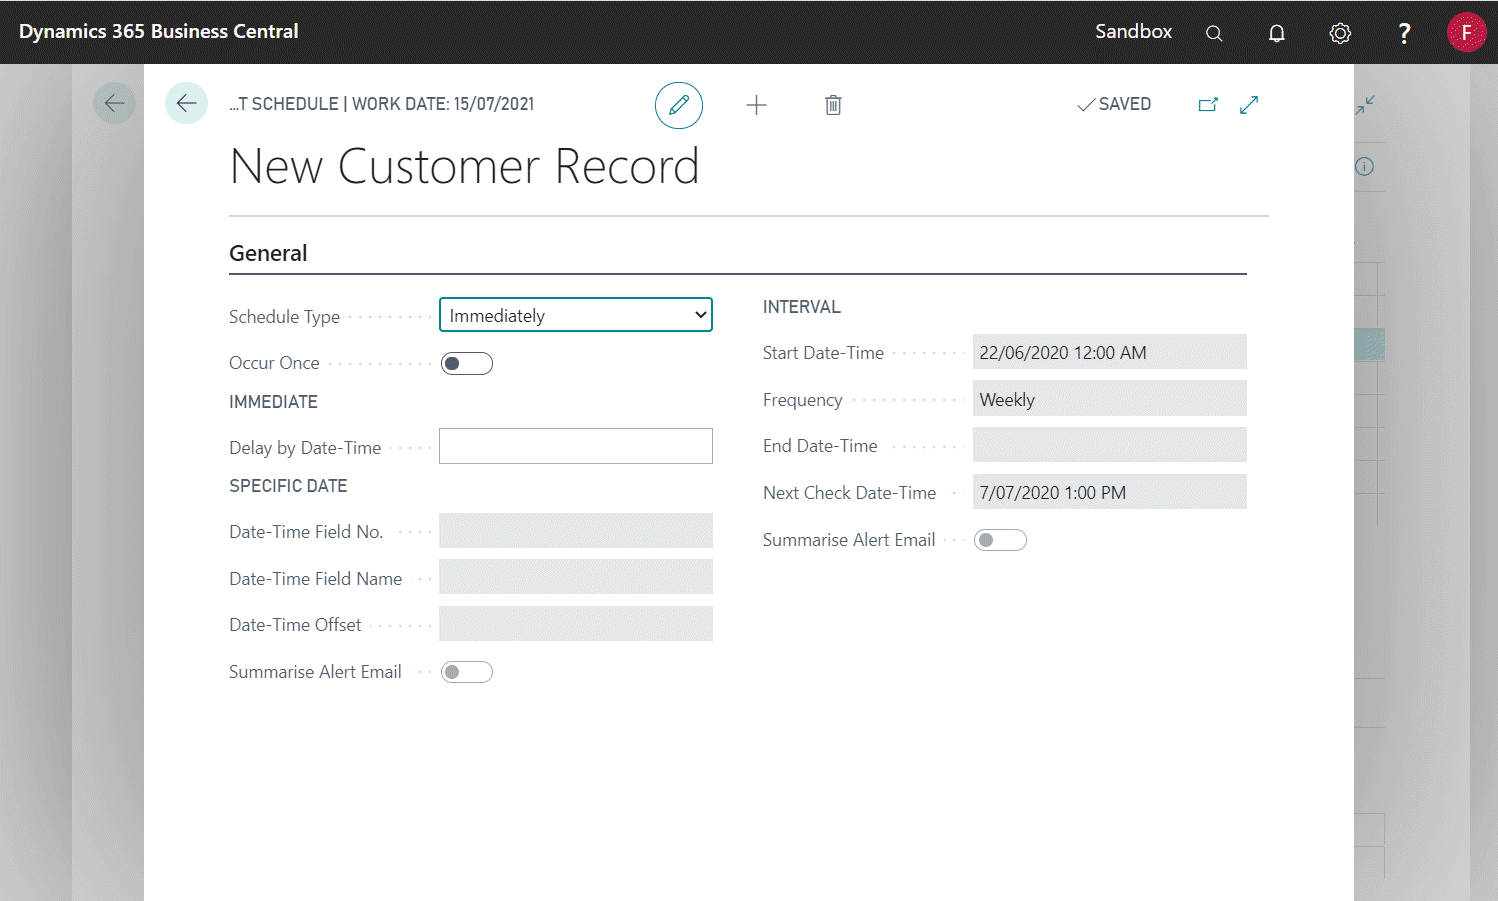
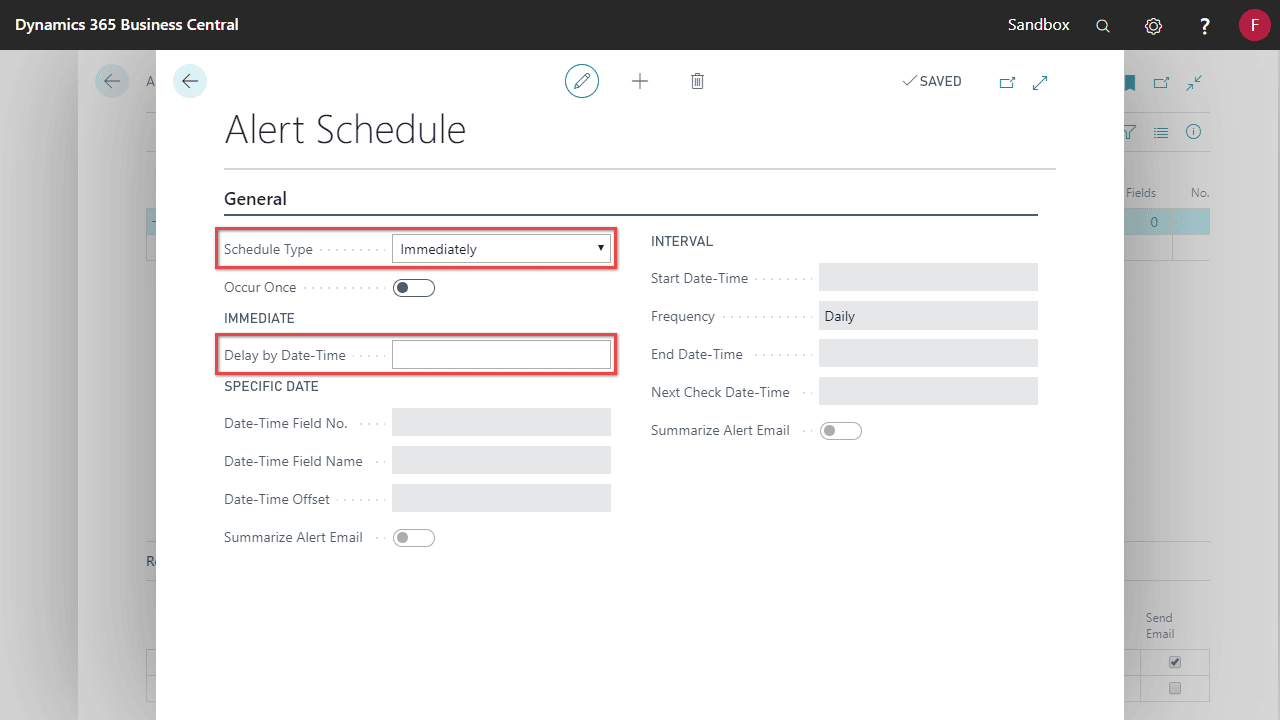
Immediately
The Alert will be sent when triggered with an optional delay, respecting any Alert Recipient Setup.
See Inventory below safety stock example.
- Enter Delay by Date-Time to delay the alert distribution.
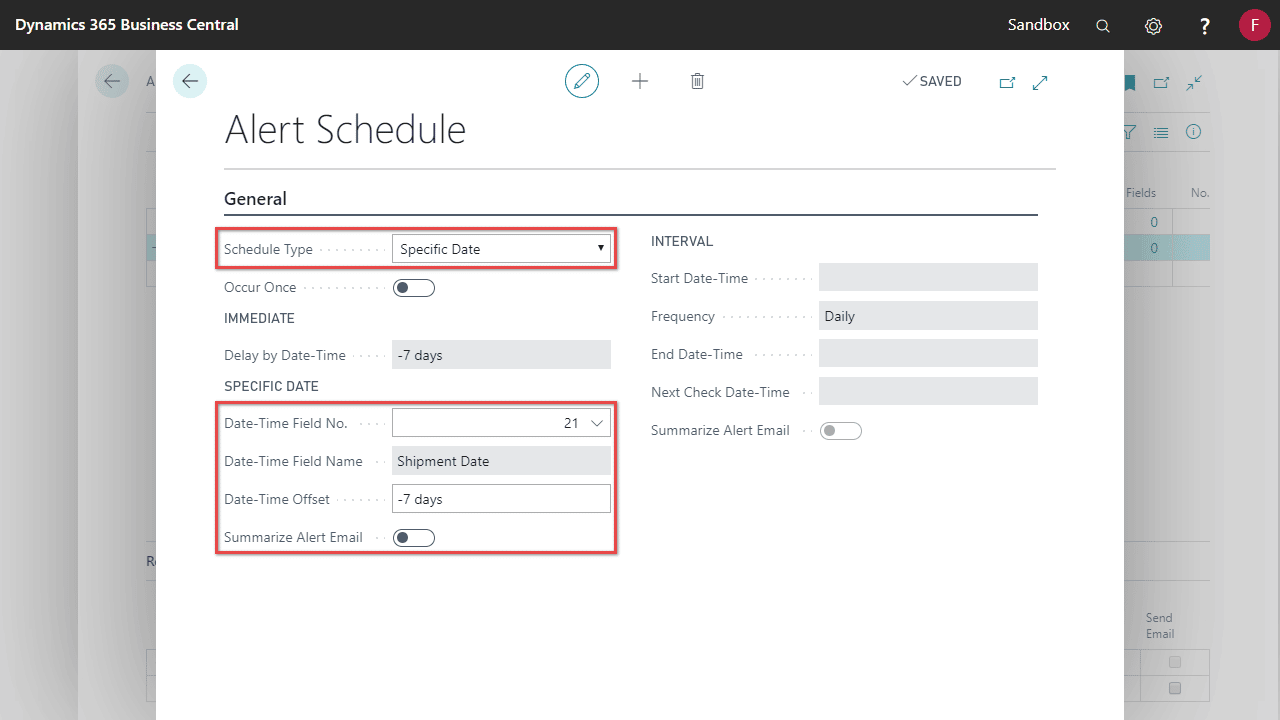
Specific Date
The Alert will be sent on a specific date based on a field from the Alert’s table. For example, this field can be the Requested Delivery Date on a Sales Order. You can also offset when the Alert is sent by a fixed time.
See Alert when 90 days after employment date example.
- Select a Date-Time Field No. See Alert Tables – Default Fields.
- (Optional) Specify a Offset by Date-Time. When a negative offset is used, the alert will be triggered before the Date-Time Field No.
- Enable Summarise Alert Email to group the pending emails into one email.
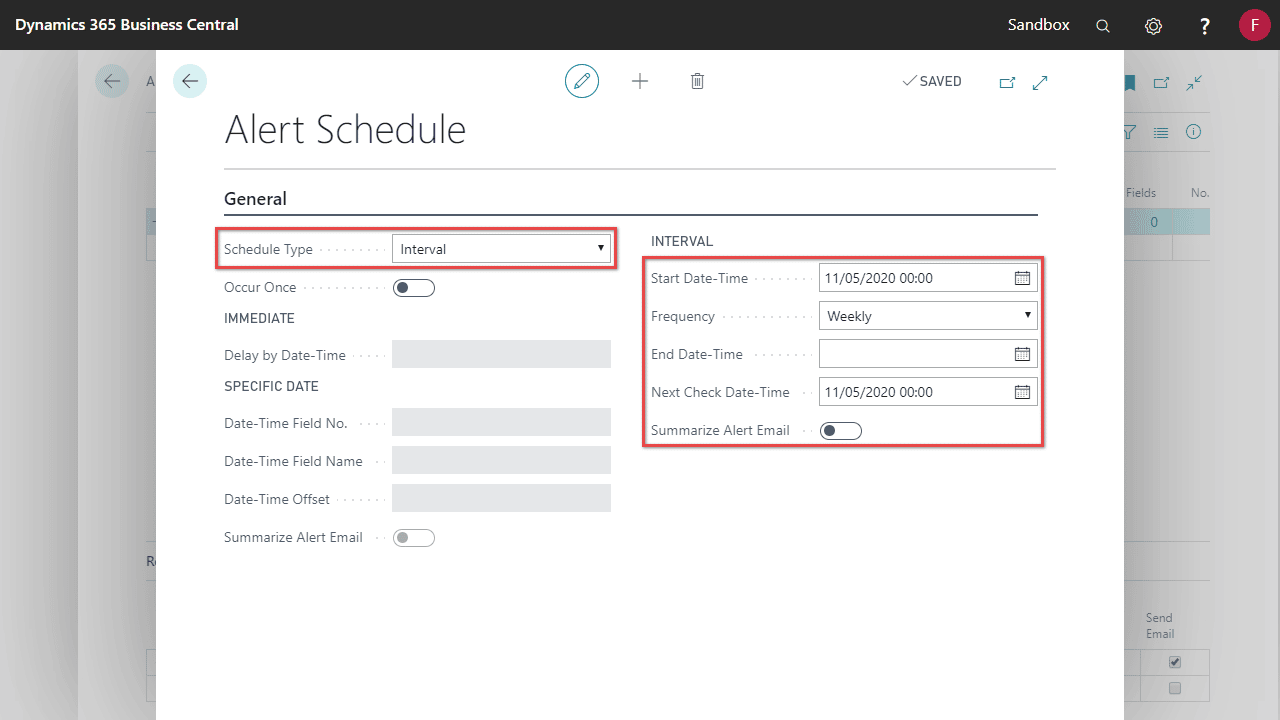
Interval
The Alert will be sent on a recurring schedule.
See Weekly summary of new customers example.
- Enter the Start Date-Time and Frequency.
- Optionally, key in End Date-Time and Next Check Date-Time.
- Enable Summarise Alert Email to group the pending emails into one email.