This article guides you through how to manage and change the included label templates that come with Label-It.
The included label templates
- Locate and open the Label Setup page via search
- From this page you can see the standard label templates included with Label-It. Take note of the template code
- To print each of these labels please refer to the Printing Labels section.
- If a label template isn’t assigned to a field, the label print actions will not be visible on the relevant pages.
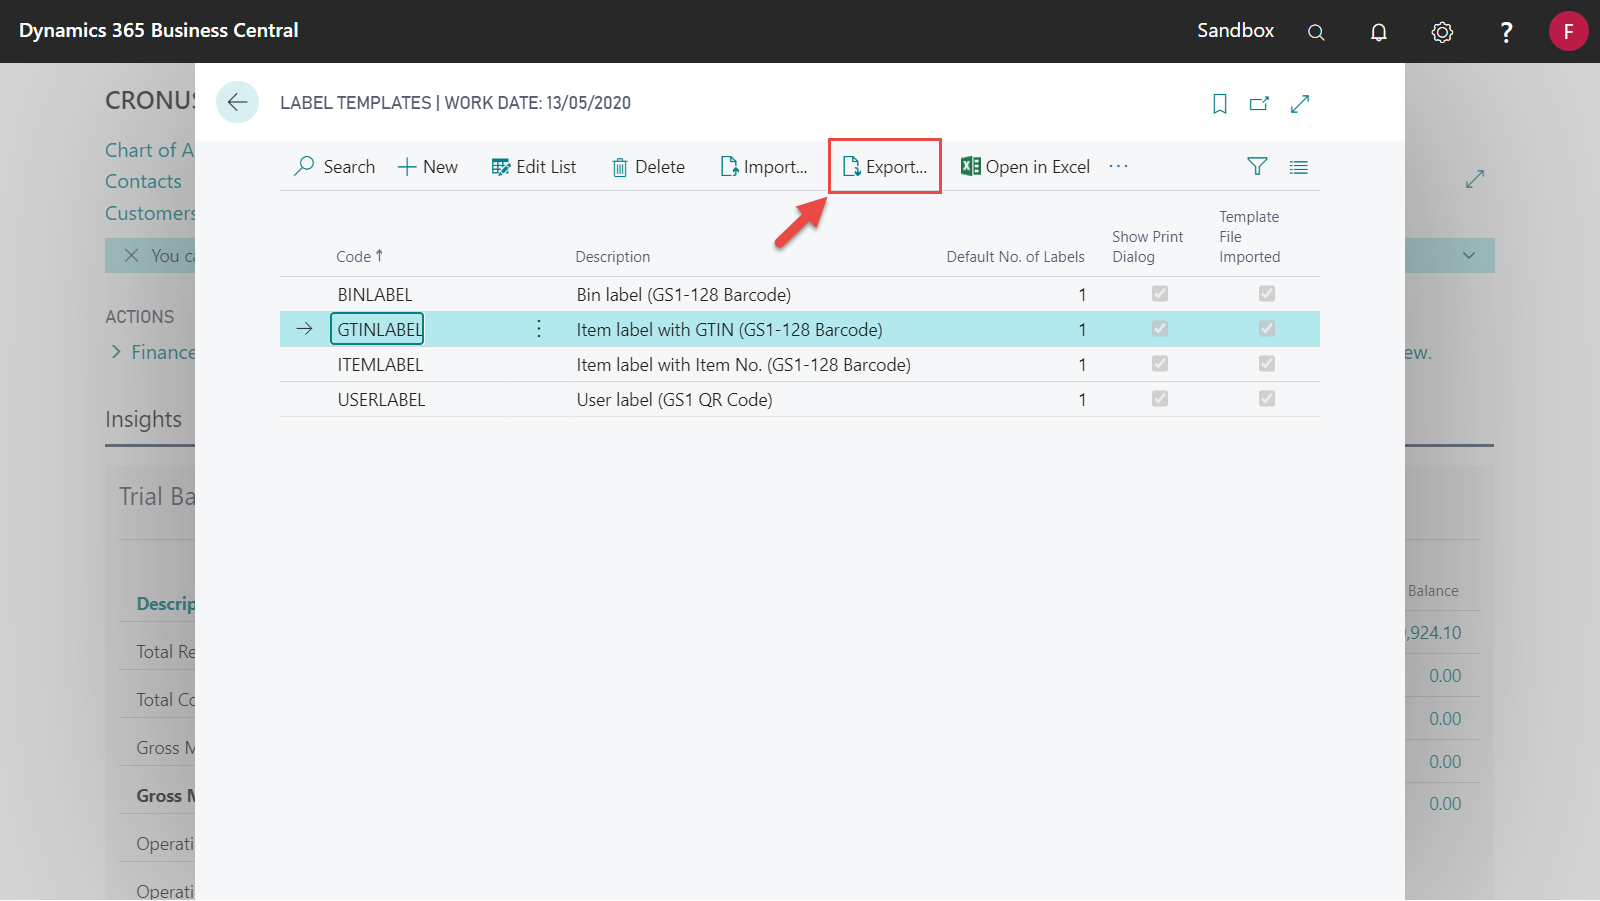
Export an existing label template
- Locate and open Label Templates via search.
- Select Export with the template record that you want to download.
- The label will be downloaded to your computer.
Customise the label template
You can customise the label template with NiceLabel Designer. For more information on how to customise the template layout, see the following video:

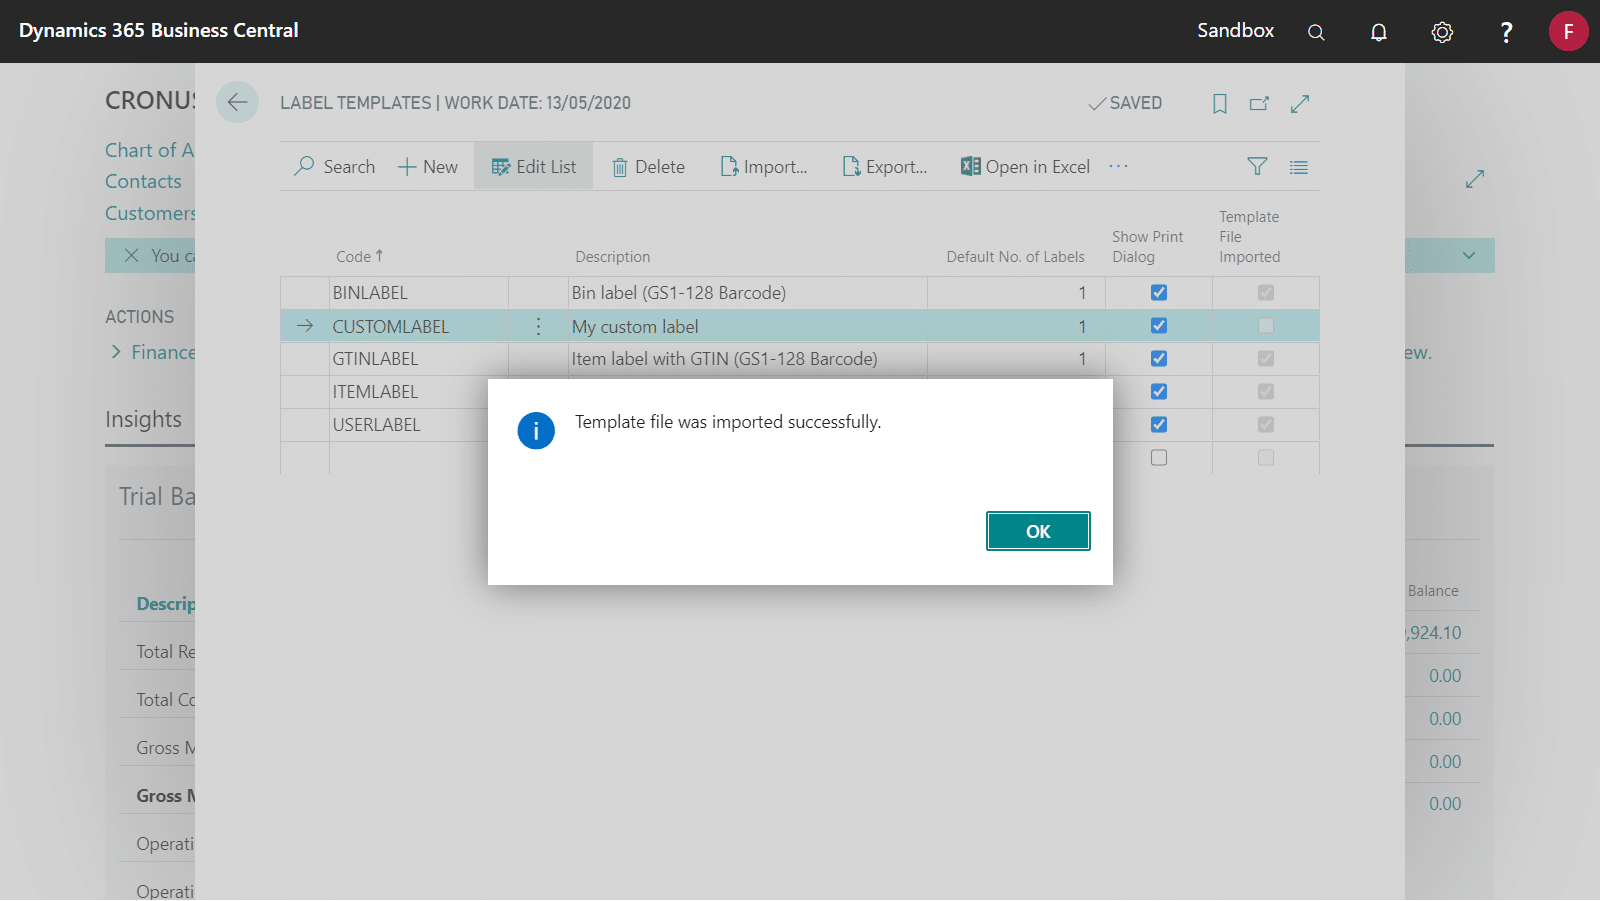
Import the custom label template
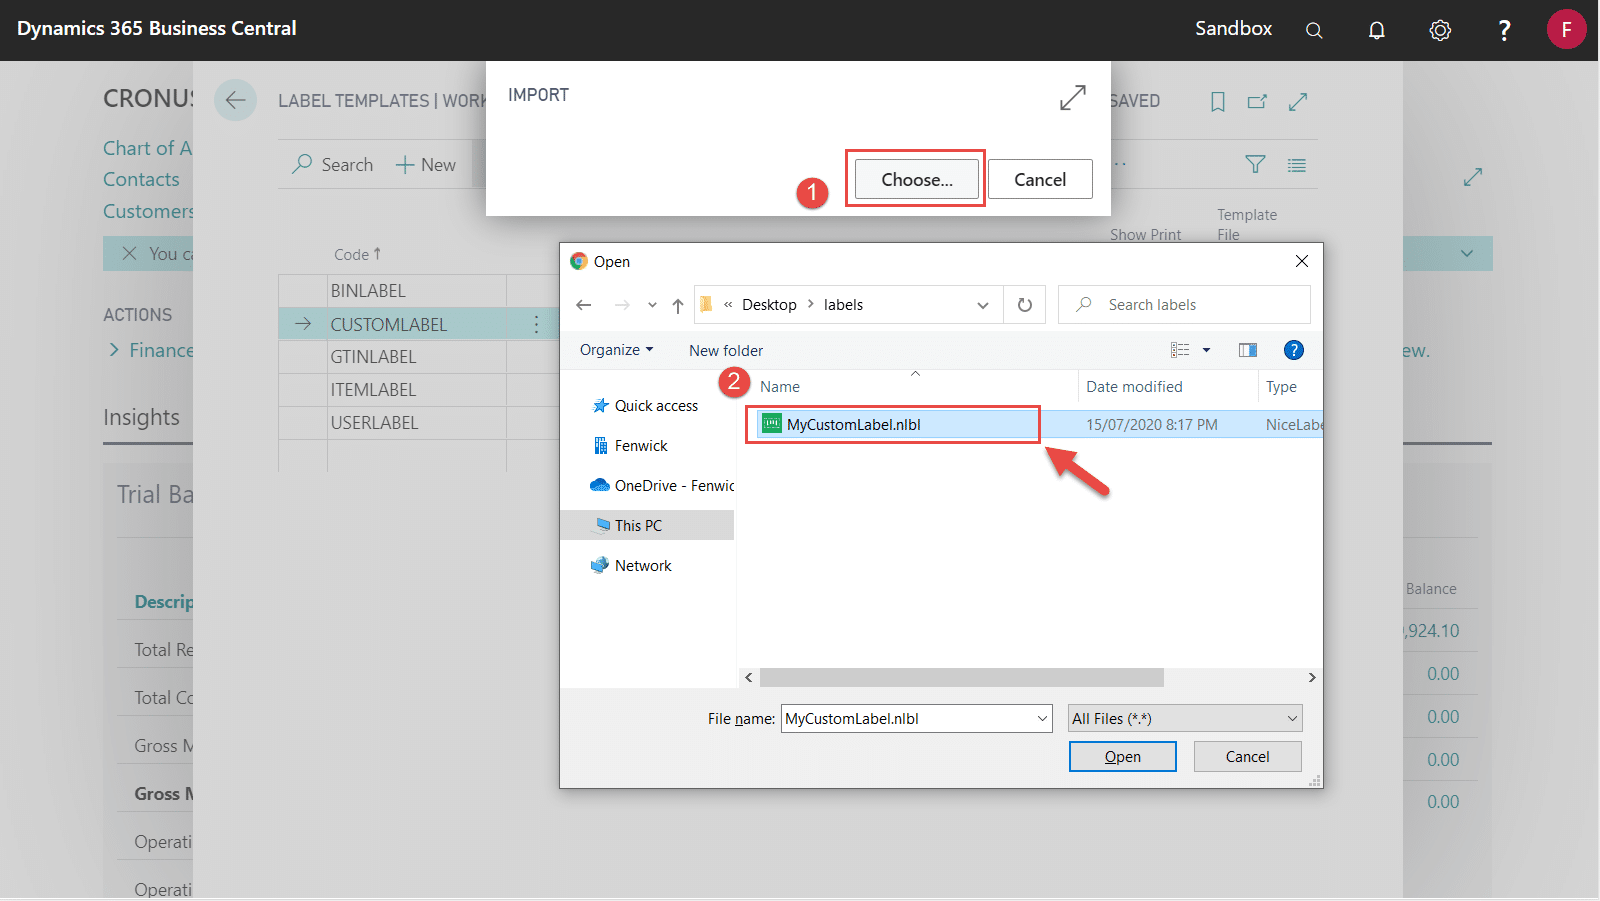
- Locate and open Label Templates via search
- Create a new template record
- Select Import for the new record
- Choose the custom label template from your computer
- Once the template file is uploaded, a dialog message will pop up and the Template File Imported indicator for the record will be marked.
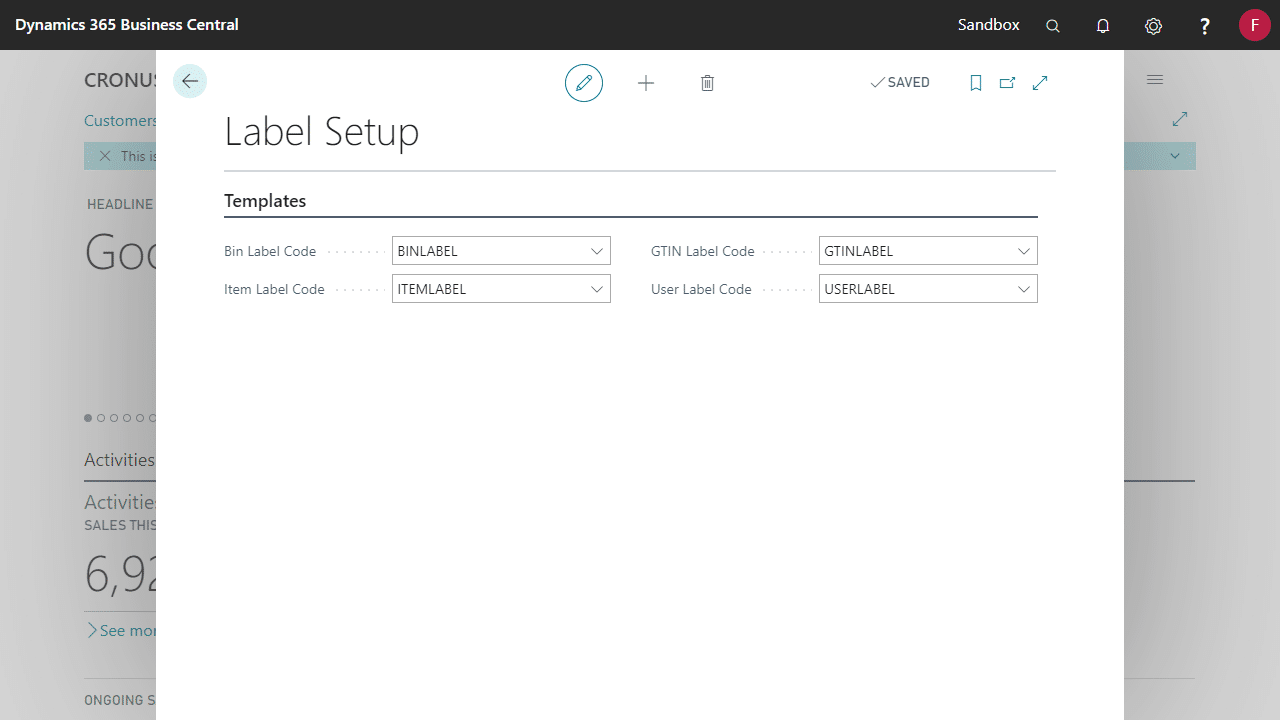
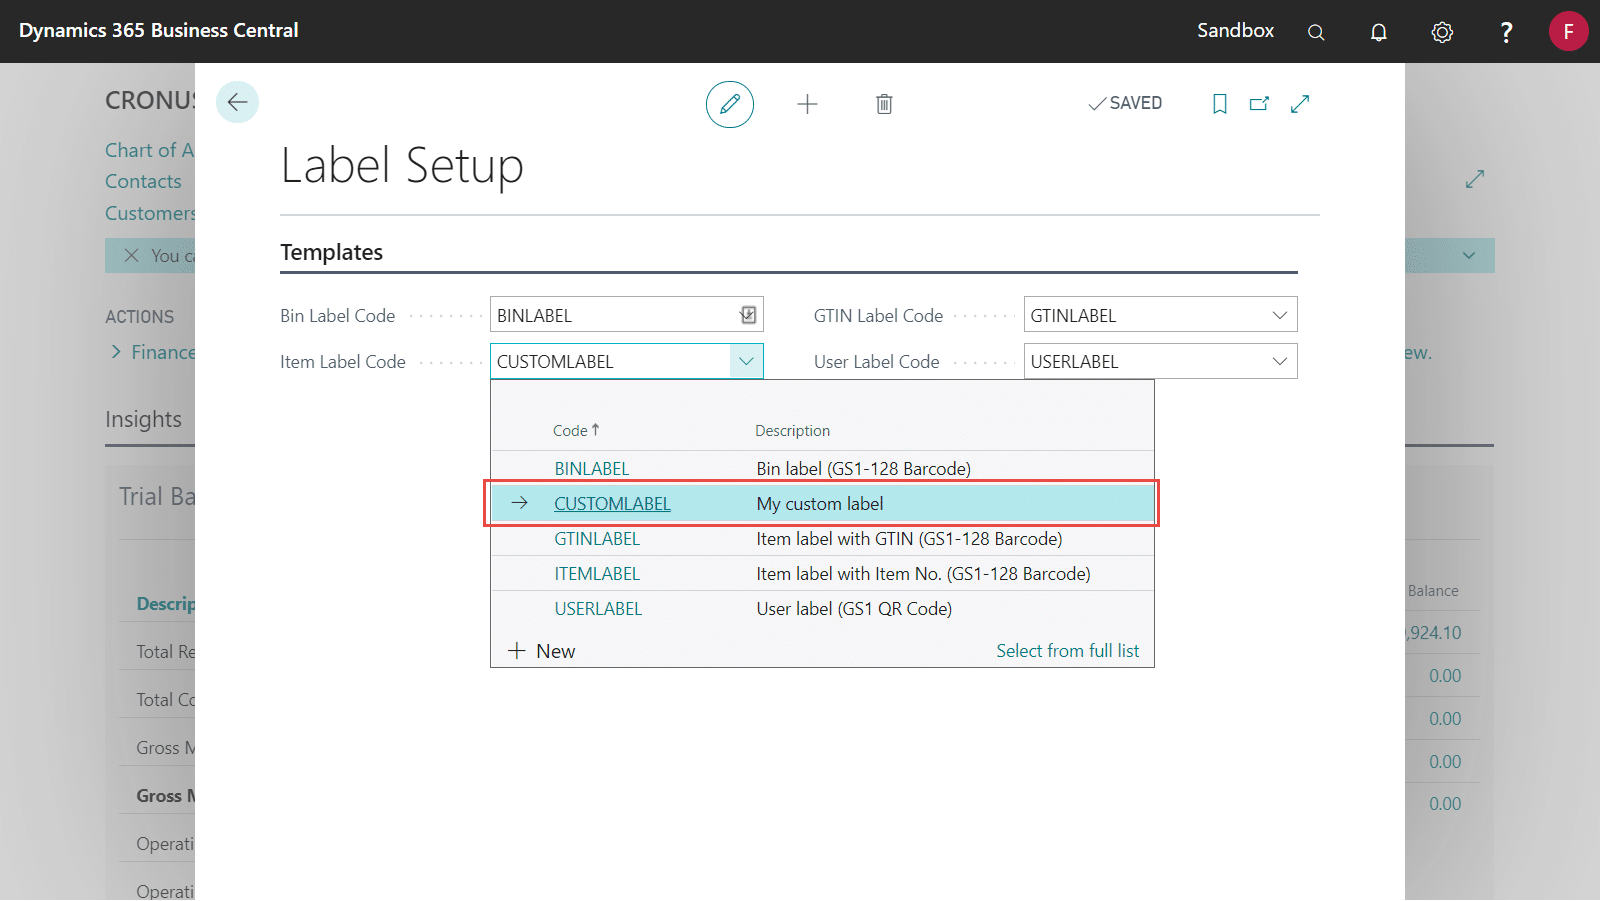
Replace a default template with your custom label template
- Locate and open Label Setup via search
- Choose the default label that you want to replace & apply your custom label
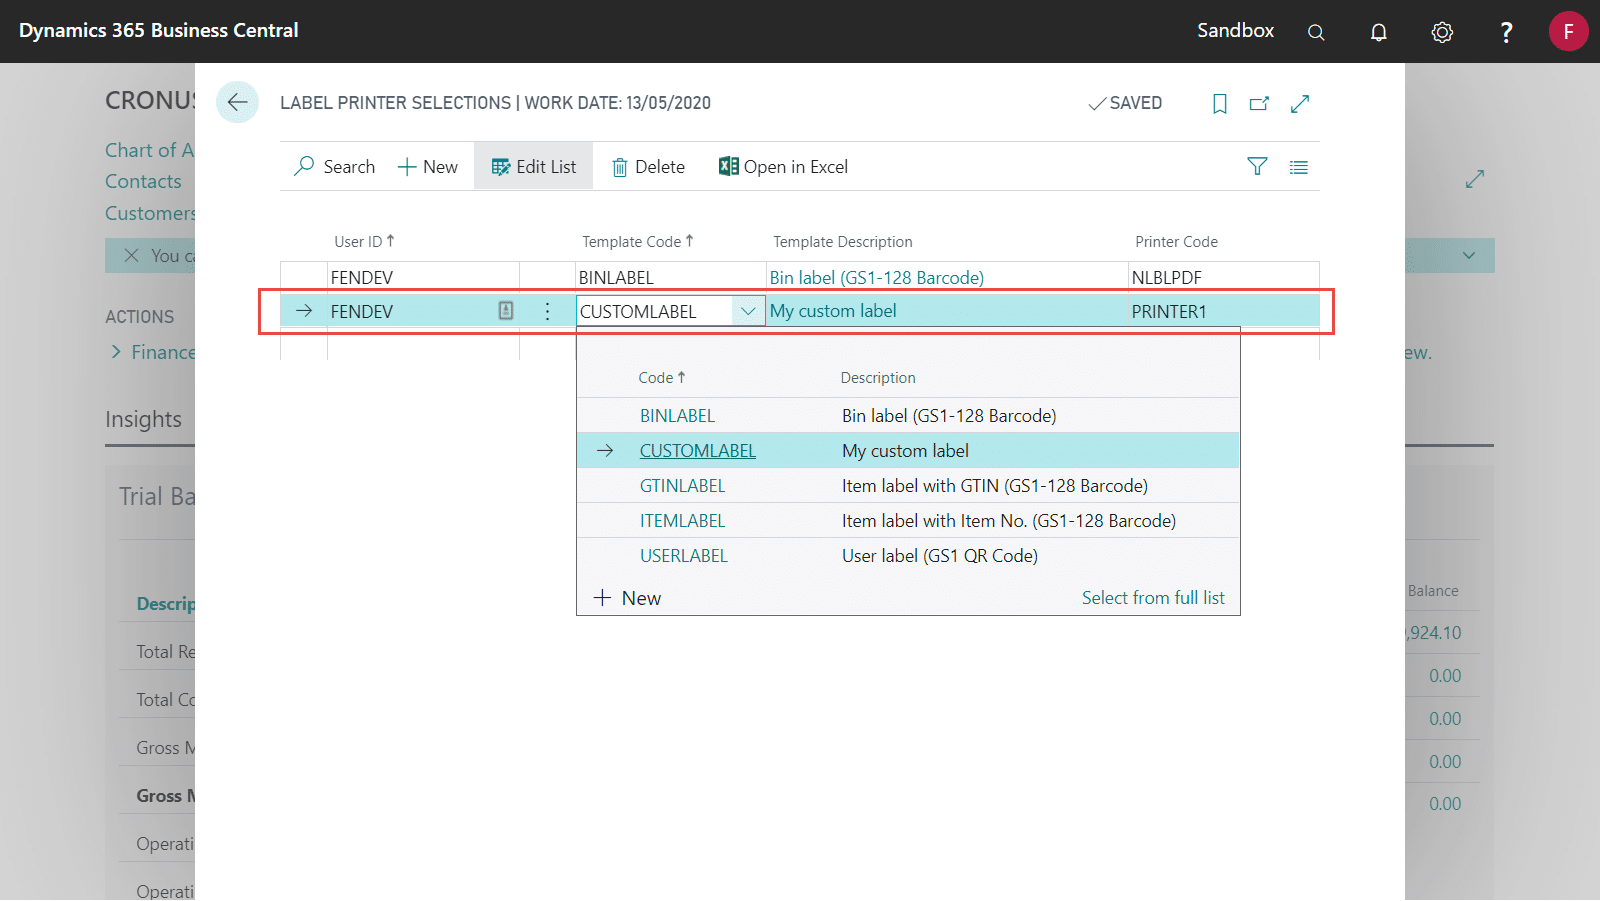
Add label printer selections
- Locate and open Label Printer Selections via search
- Create a new record for your user with the custom label and the printer that you want to print from