Label-It can be extended by using your own business logic and workflow.
This article assumes that you already have basic knowledge of Business Central AL development. If you would like Fenwick to develop custom label templates and app for you, please contact us.
The application you build with this guide will do two things:
- Define a custom Label Template on the Label Setup page.
- Print a label from the Customer Card page. The label will display the customer’s number and name.
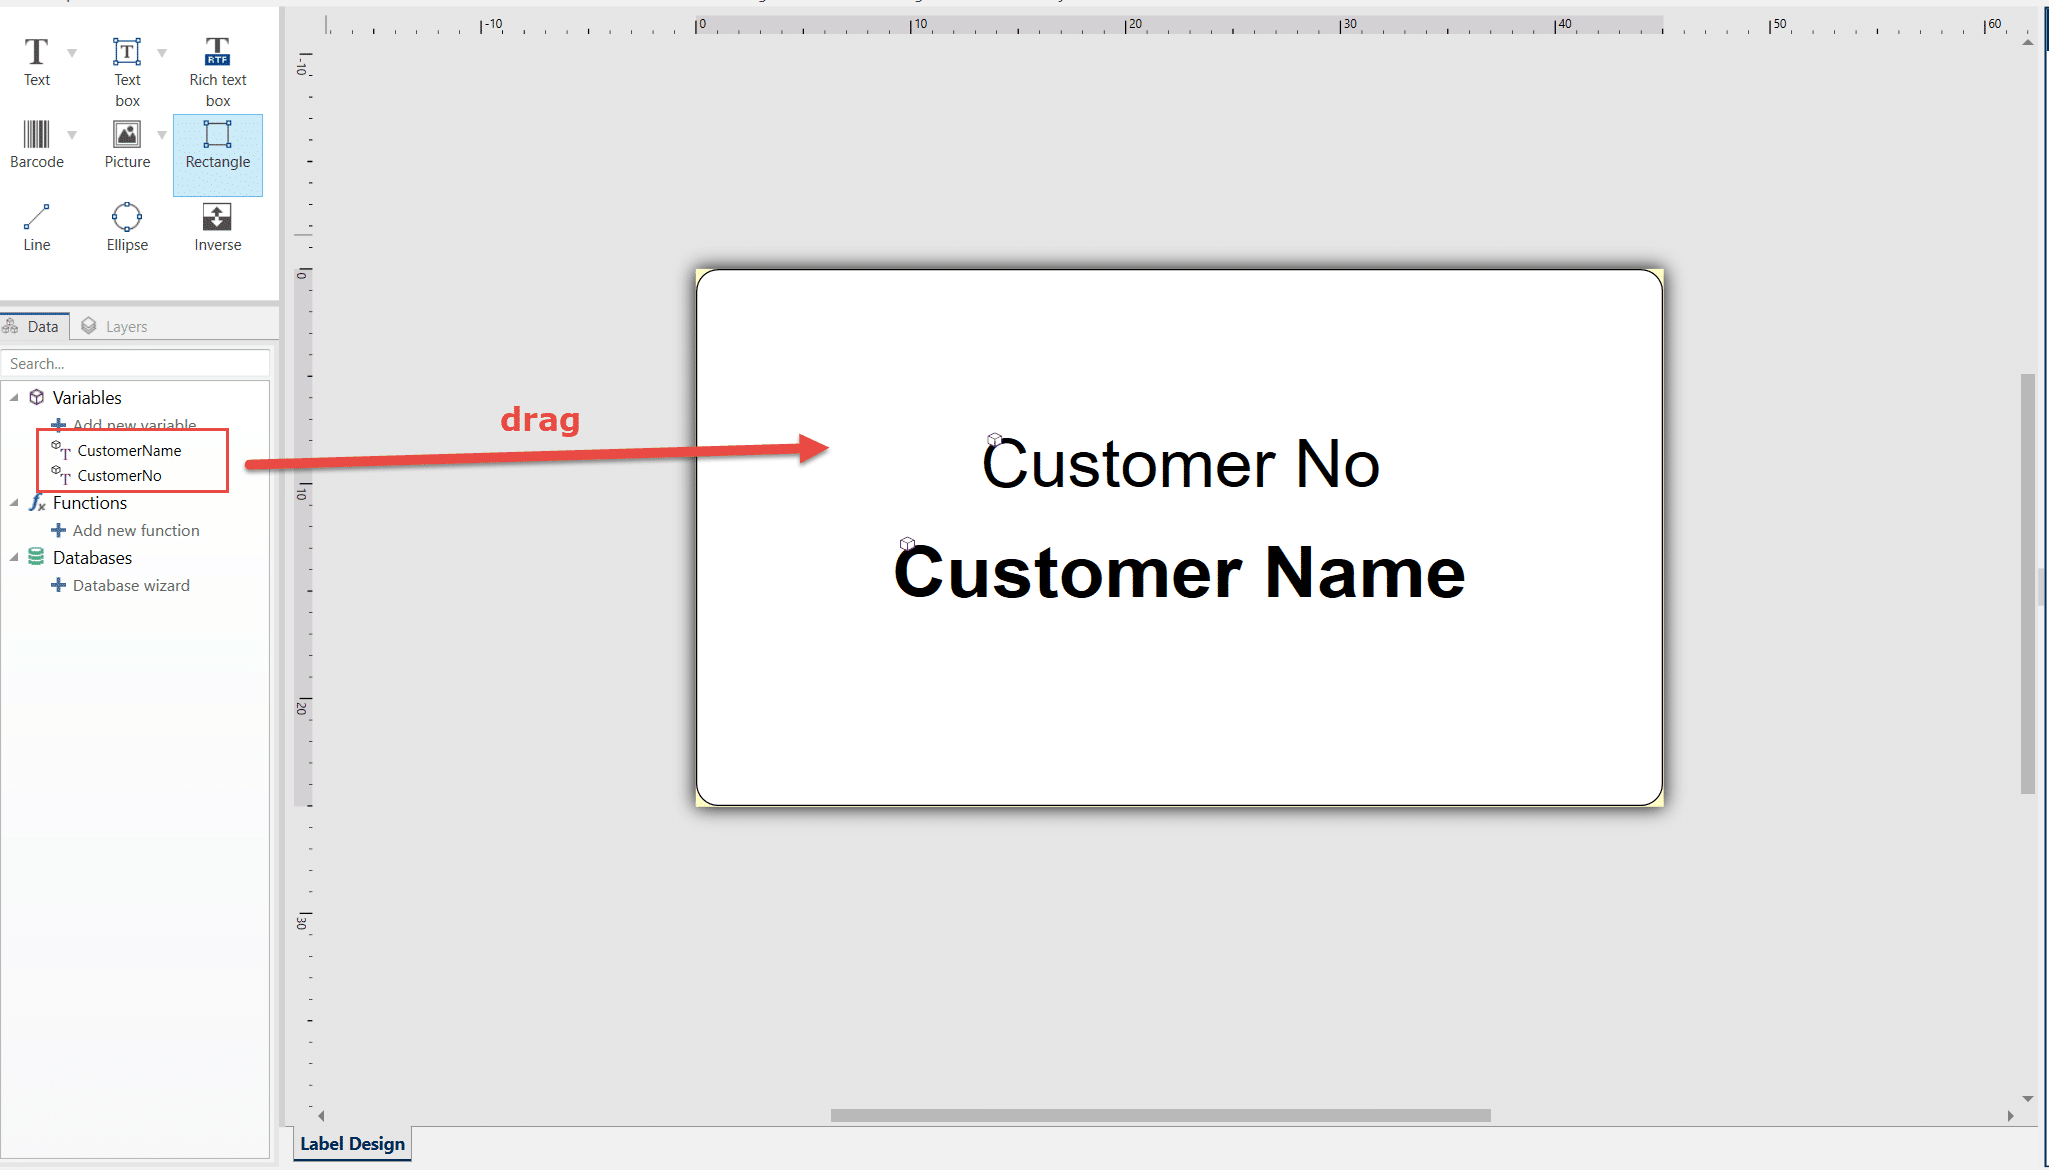
Designing a label with NiceLabel Designer
Design a simple label that displays the customer’s name and number.
To get started, you will first need install NiceLabel Designer with a suitable license on your computer.
- Open the NiceLabel Designer software
- Navigate to Start > Create a New Label
- Follow the New Label Setup wizard and create a portrait label
- Create and add the following variables to the layout: CustomerNo and CustomerName
- Save the template layout as a NiceLabel (
.nlbl) file on your computer
Developing the app
The app will include the following objects:
- A Label Setup table and page extensions
- A Customer page extension
In app.json, add a dependency on the Label-It app:
{
      "appId": "<insert-Label-It-appId-here>",
      "name": "Label-It",
      "publisher": "Fenwick",
      "version": "15.0.0.0"
}
Extending the Label Setup table and page
The following code adds a new field on the Label Setup table and page. This field will be used later to define the code of the custom label template.
tableextension 50001 LabelSetupExt extends FSG_LI_LabelSetup
{
    fields
    {
        field(50001; CustomLabel; Code[20])
        {
            DataClassification = CustomerContent;
            Caption = 'Custom Label';
        }
    }
}

pageextension 50001 LabelSetupExt extends FSG_LI_LabelSetup
{
    layout
    {
        addlast(Content)
        {
            field(FCustomLabel; CustomLabel)
            {
                ApplicationArea = All;
                ToolTip = 'Specifies the code of the custom label template.';
            }
        }
    }
}
Extending the Customer page
The following code adds a new action on the Customer Card page along with a custom function that stages the data in a print buffer and then sends the print job to the Label-It app for printing.
pageextension 50002 CustomerCardExt extends "Customer Card"
{
    actions
    {
        addlast(processing)
        {
            action(PrintAddressLabel)
            {
                ApplicationArea = All;
                Caption = 'Print customer label';
                Tooltip = 'Print customer label with the number and name.';
                Image = Print;

                trigger OnAction()
                begin
                    PrintCustomerLabel();
                end;
            }
        }
    }

    procedure PrintCustomerLabel(): Boolean;
    var
        LabelSetup: Record FSG_LI_LabelSetup;
        LabelTemplate: Record FSG_LI_LabelTemplate;
        LabelEntryBuffer: Record FSG_LI_LabelEntryBuffer temporary;
        LabelEntryFieldBuffer: Record FSG_LI_LabelEntryFieldBuffer temporary;
        LabelMgt: Codeunit FSG_LI_LabelManagement;
    begin
        // Get the code of the custom label template that is defined on the Label Setup table.
        LabelSetup.Get();
        if LabelTemplate.Get(LabelSetup.CustomLabel) then begin

            // Set up the print buffer with the label template
            LabelMgt.BuildLabelEntry(LabelEntryBuffer, LabelTemplate);

            // Put the customer's number and name onto the print buffer
            LabelEntryFieldBuffer.SetEntryNo(LabelEntryBuffer.FSG_LI_EntryNo);
            LabelEntryFieldBuffer.InsertField(1, 'CustomerNo', Rec."No.", true, true);
            LabelEntryFieldBuffer.InsertField(2, 'CustomerName', Rec.Name, true, true);

            // Send the print buffer to Label-it for printing
            if LabelMgt.PrintLabel(LabelEntryBuffer, LabelEntryFieldBuffer, 2) then begin
                exit(true);
            end;
        end;
    end;
}Note: Make sure that you match up the variable names from the NiceLabel label on the highlighted fields below, otherwise your values will not show in the printed label.
Testing out the custom label
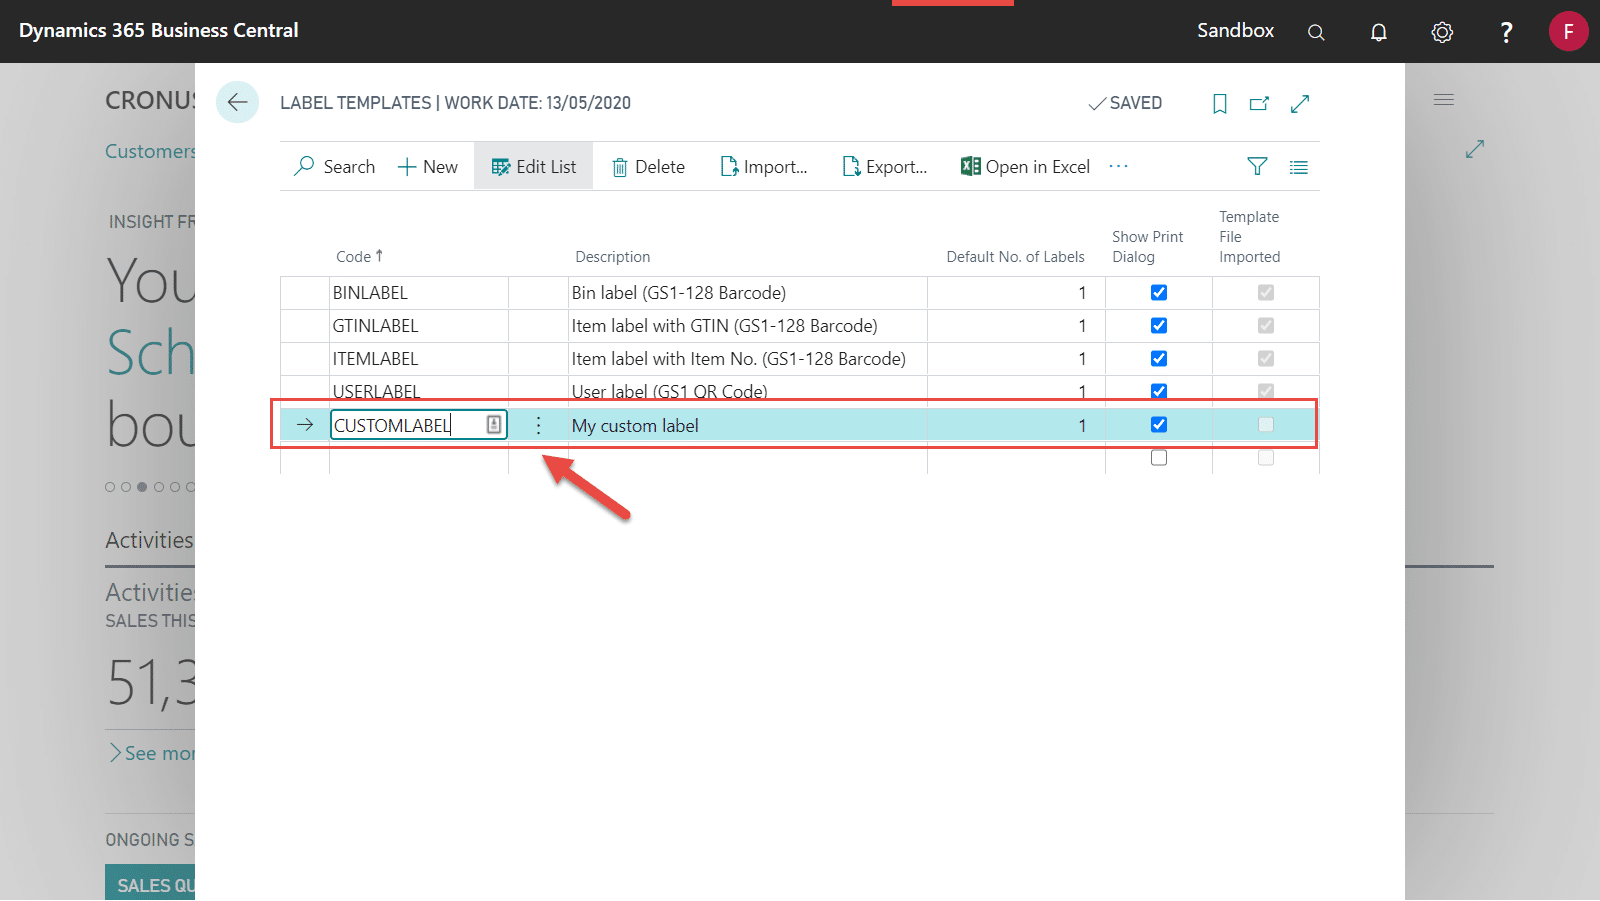
Label Templates
- Search and open the Label Templates page
- Insert a new Label Template record for the custom label
- Import the NiceLabel layout file from your computer
- After the import, a dialog message should pop up to indicate that the label was successfully imported
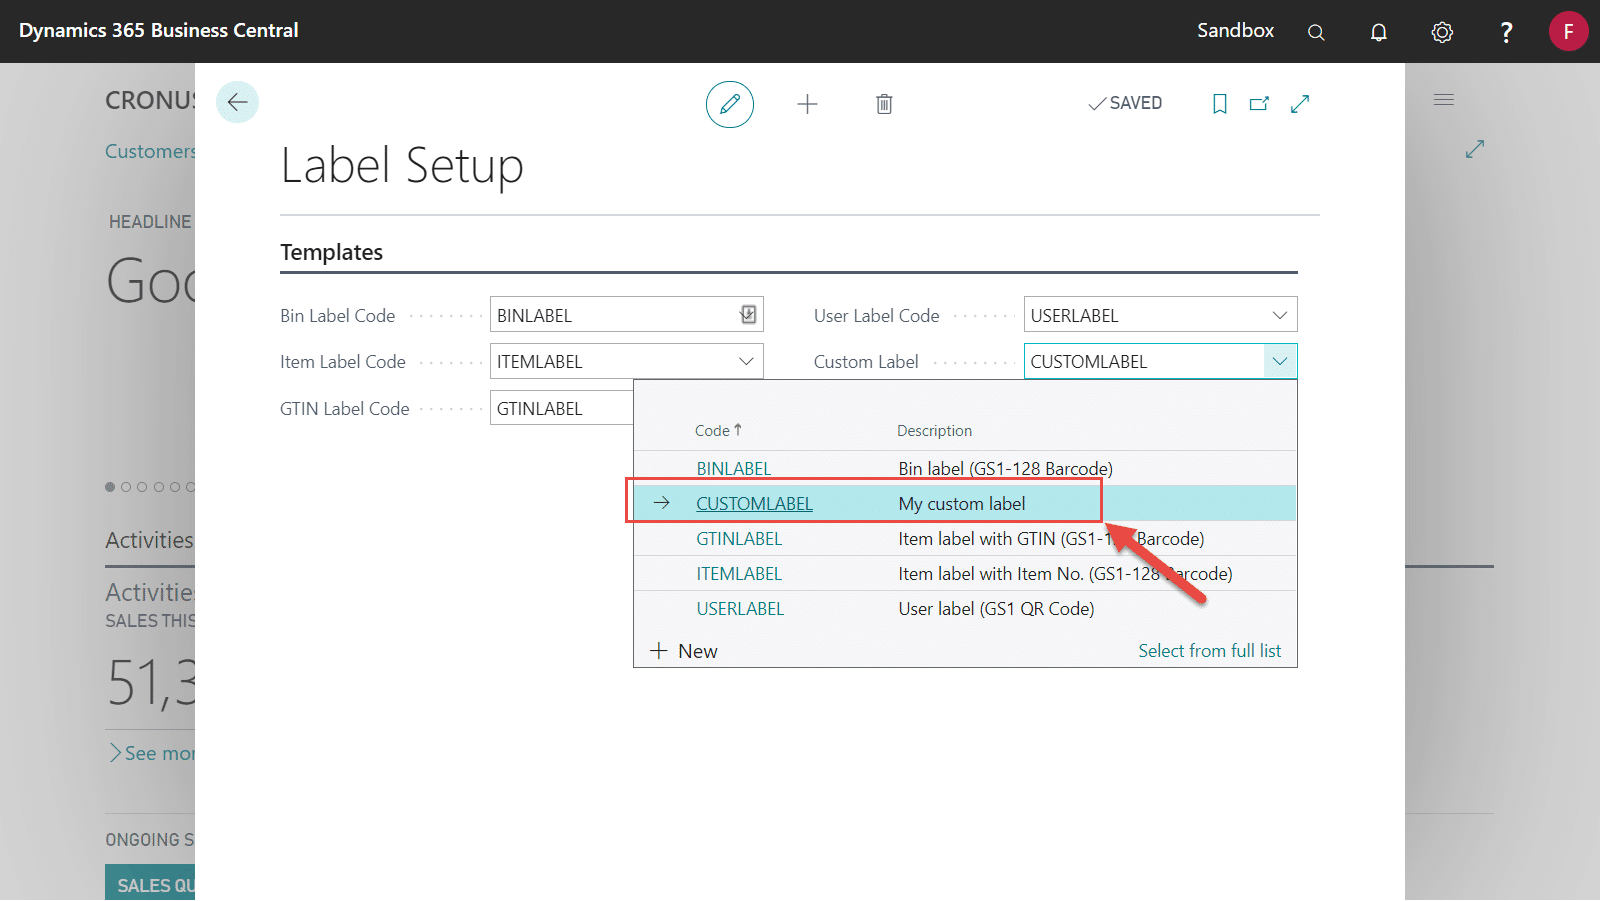
Label Setup
- Search and open the Label Setup page
- On the Custom Label field, pick the template that you created in the previous steps
Label Printer Selections
- Search and open the Label Printer Selections page
- Insert a new record for the custom template with your current user and the target printer
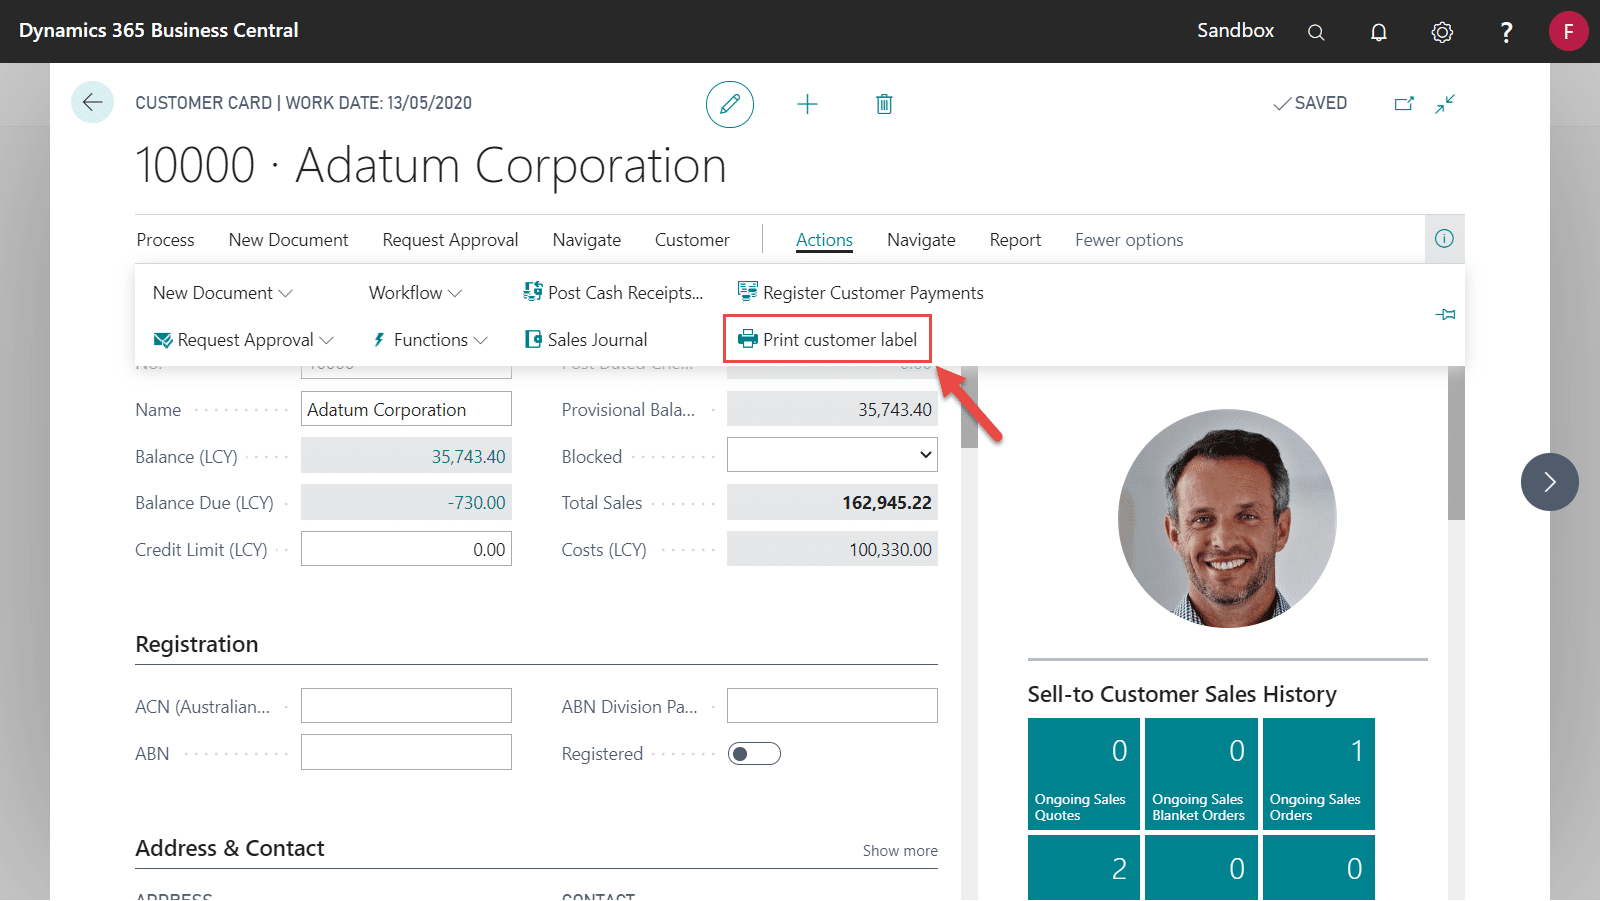
Customer Card
- Search and open the Customer Card page for a customer
- Navigate to Actions > Printer customer label and click on the action
- Check the customer details on the print dialog, then click on OK to print the label
- The print job will be sent to your selected printer