This article only applies to Loftware Cloud printer integrations.
To manage label templates for NiceLabel PowerForms Suite edition, see Creating and Managing Label Templates.
Before you can print labels using a Loftware Cloud printer integration, you must map the template file stored in Documents on Loftware Cloud Control Center to Label Templates in Business Central.
Map label templates in Loftware Control Center
Follow these steps to map the label templates in Loftware Control Center:
- Go to Documents > Choose All Files tab.
- In the Documents tab, use the provided buttons to upload the Nicelabel template file (
.nlbl) or folder. - Once the template file is uploaded, select the template file.
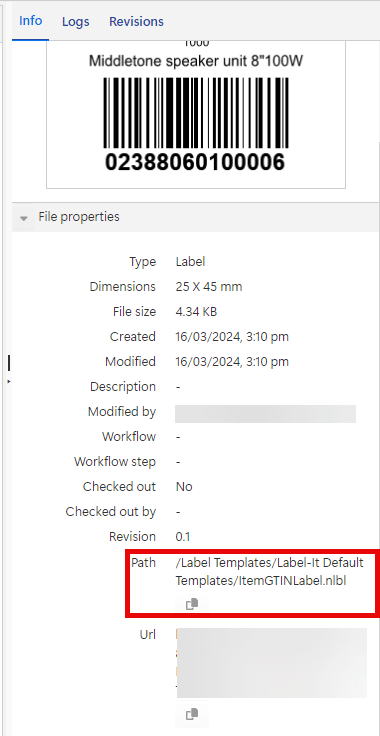
- On the Info tab, scroll down to File Properties and copy the Path.
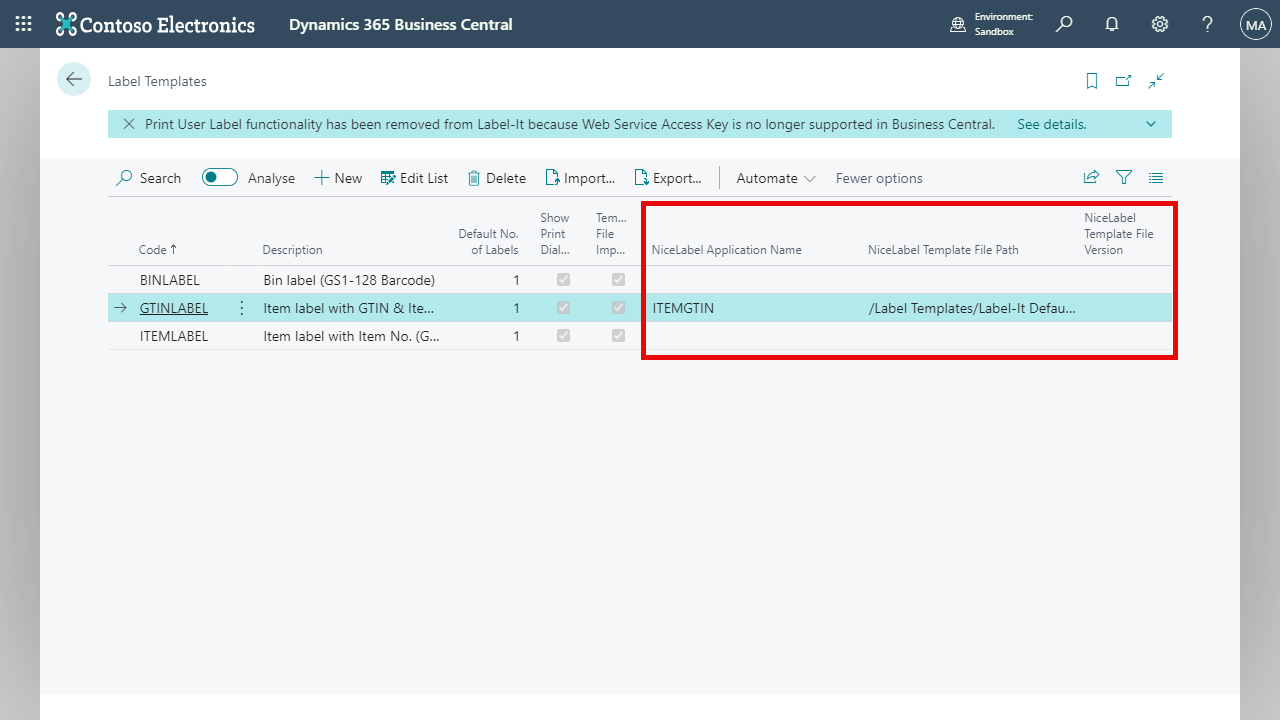
Map label templates in Business Central
Follow these steps to map the label templates in Business Central:
- Search & open “Label Templates” page.
- Click New and configure the following settings:
- Code: Specifies an unique value for the label template.
- Description: Specifies a description of the label template.
- Loftware Template File Path: Paste the copied Path into this field. This is used to establish mapping to Loftware Cloud.
- Loftware Application Name: This field is required for Cloud Web Printing. See this article for more details.
- Loftware Template File Version: This is optional. If blank, the app will print the latest version.
- Save the record.