Before using the Cloud Print API, you must configure the integration in the Loftware Cloud Developer Portal and Control Center.
Step 1: Purchase Loftware Cloud
Begin by obtaining a Loftware Cloud Business license. This can be done through any Loftware reseller, including Fenwick. The “Business” edition of Loftware Cloud is required as it allows API connectivity.
For Fenwick to process your order, please advise:
- Email that the subscription invitation should be sent to.
- Your unique URL prefix
- This will appear on your Loftware Cloud portal as
youraccount.onnicelabel.com.
- This will appear on your Loftware Cloud portal as
- Your company details.
- The number of printers required.
We will create a 30‑day trial subscription. Once the setup is complete, you will receive an email invitation. After the trial ends, your annual subscription will be billed upfront. Currently, we do not offer monthly subscription.
Step 2: Configure Loftware Cloud API
Follow this guide by Loftware to subscribe to the Loftware Developer Portal, create an integrator key and connect the developer portal’s subscription to your Control Center.
- Signing up to the Developer Portal.
- Subscribing to Loftware Cloud APIs and creating subscription keys.
- Creating a Control Center Integrator key.
- Connecting your Developer Portal subscription to Control Center.
Step 3: Connect your label printer to Loftware Cloud
Understanding the Loftware Cloud printer types
When setting up the Cloud Print API printer integration, there are two printer types to choose from. This section helps you to understand the difference of the two printer types:
- CloudPrinter: These printers connect directly to Loftware Cloud without needing any software or drivers installed on your computer. They are easy to set up and use, but are limited to the following brands and models (as of April 2025):
- Zebra printers with Link-OS printer operating system.
- SATO CLNX series.
- Epson CW series printers.
- See the full list of supported printers here.
- PrintQueue: Use this option if your printer is connected to a computer or network and is not listed as a supported Cloud Printer. This method works with most standard label printers. It requires a local driver to be installed and run on a dedicated computer that’s connected to the printer.
To learn more about each printer type, check out this article: Loftware Cloud – Cloud Print API.
Managing printers on the Loftware Cloud Control Center
To set up your Cloud Printers and Print Queues, please follow these user guides:
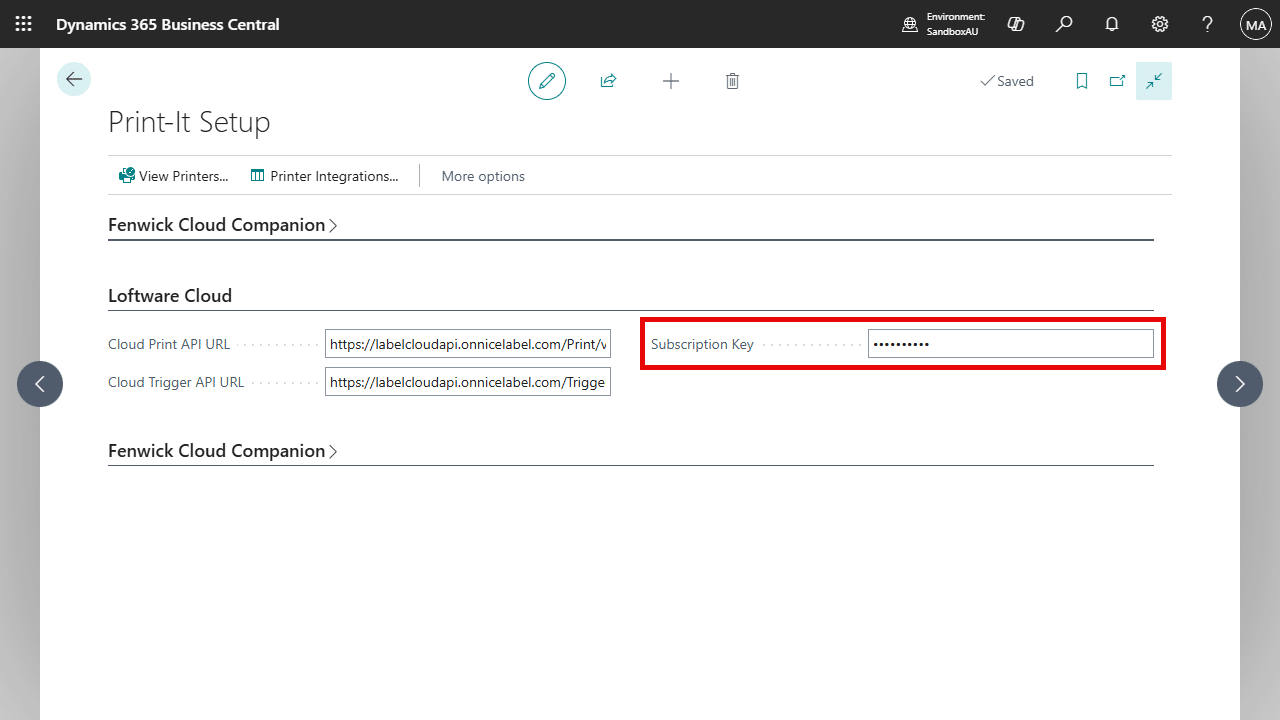
Step 4: Adding subscription key in Business Central
- Search and open Print-It Setup page.
- Under the Loftware Cloud tab, paste the copied primary key into Subscription Key field.
- Save your changes.
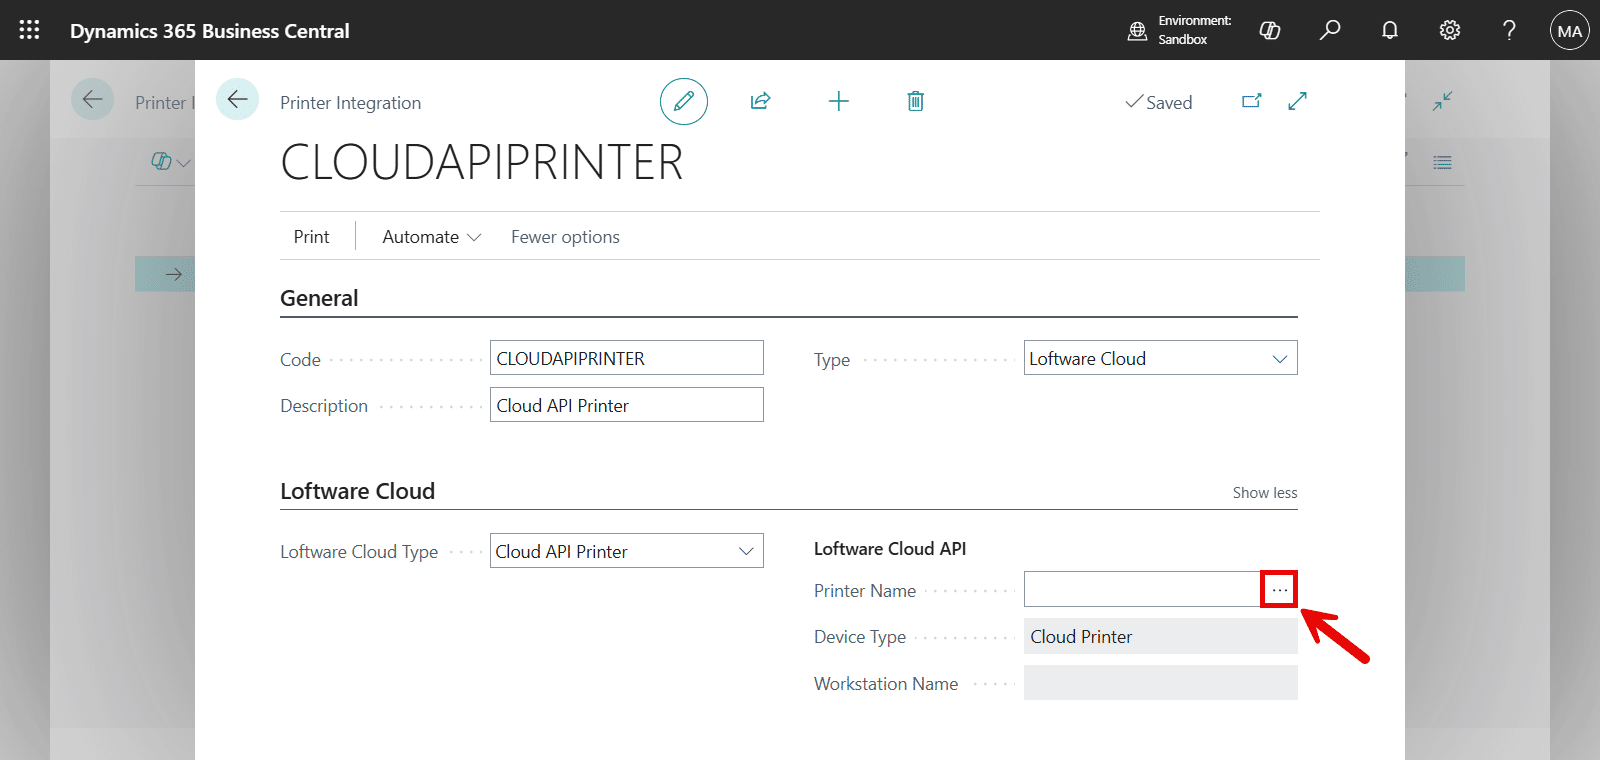
Step 5: Creating printer integration in Business Central
- Search and open Printer Integrations page.
- Create a new Printer Integration.
- Enter a Code and Description,
- On the Type drop-down field, choose “Loftware Cloud” and the Loftware Cloud tab will appear on the screen,
- On the Loftware Cloud Type dropdown, choose Cloud API Printer,
- Use the lookup button on the Printer Name field,
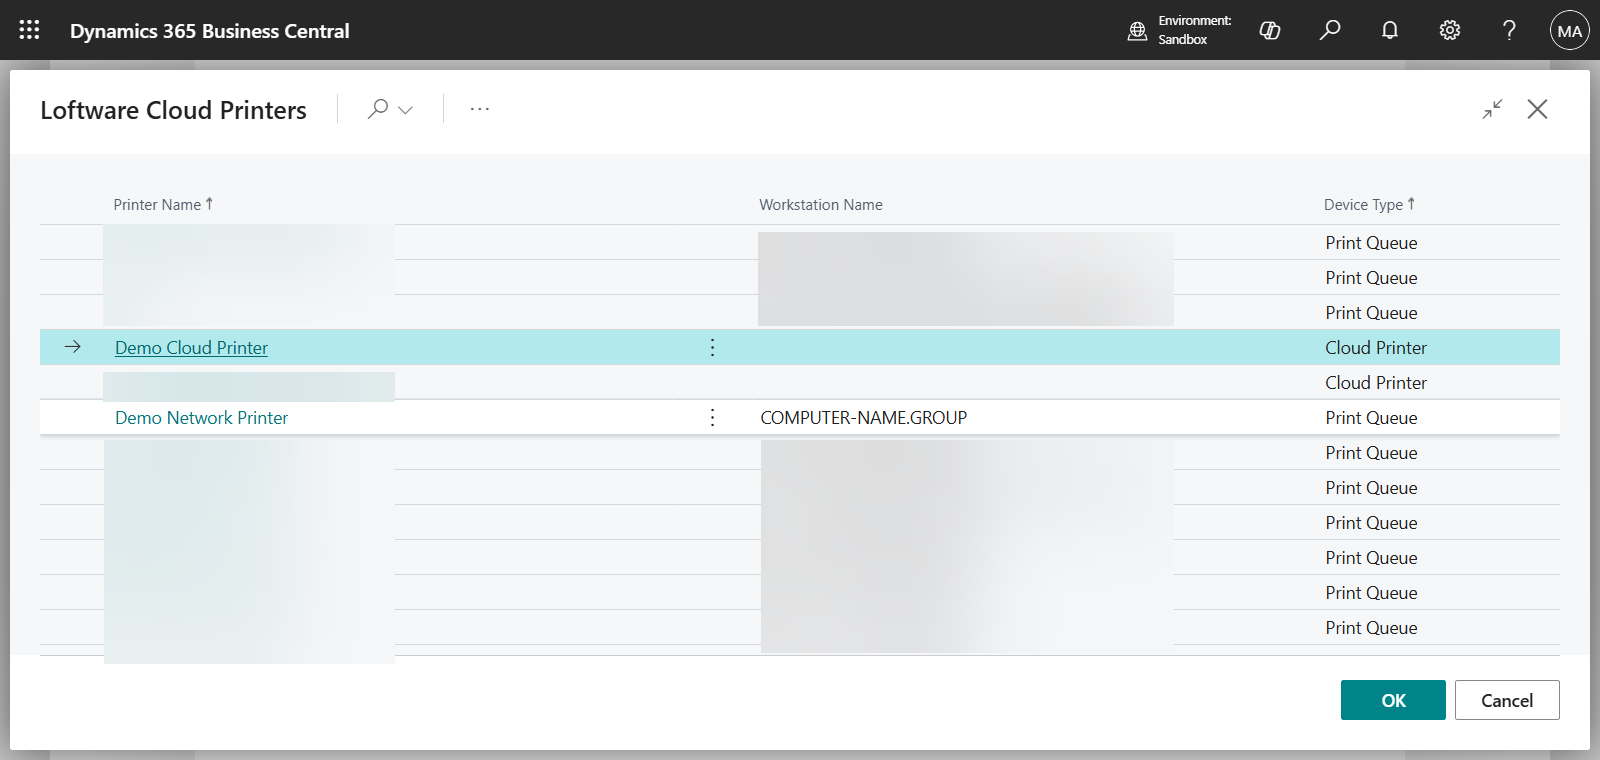
- A dialog will open and display all printers connected to your Loftware Cloud instance. Select a printer from the list.
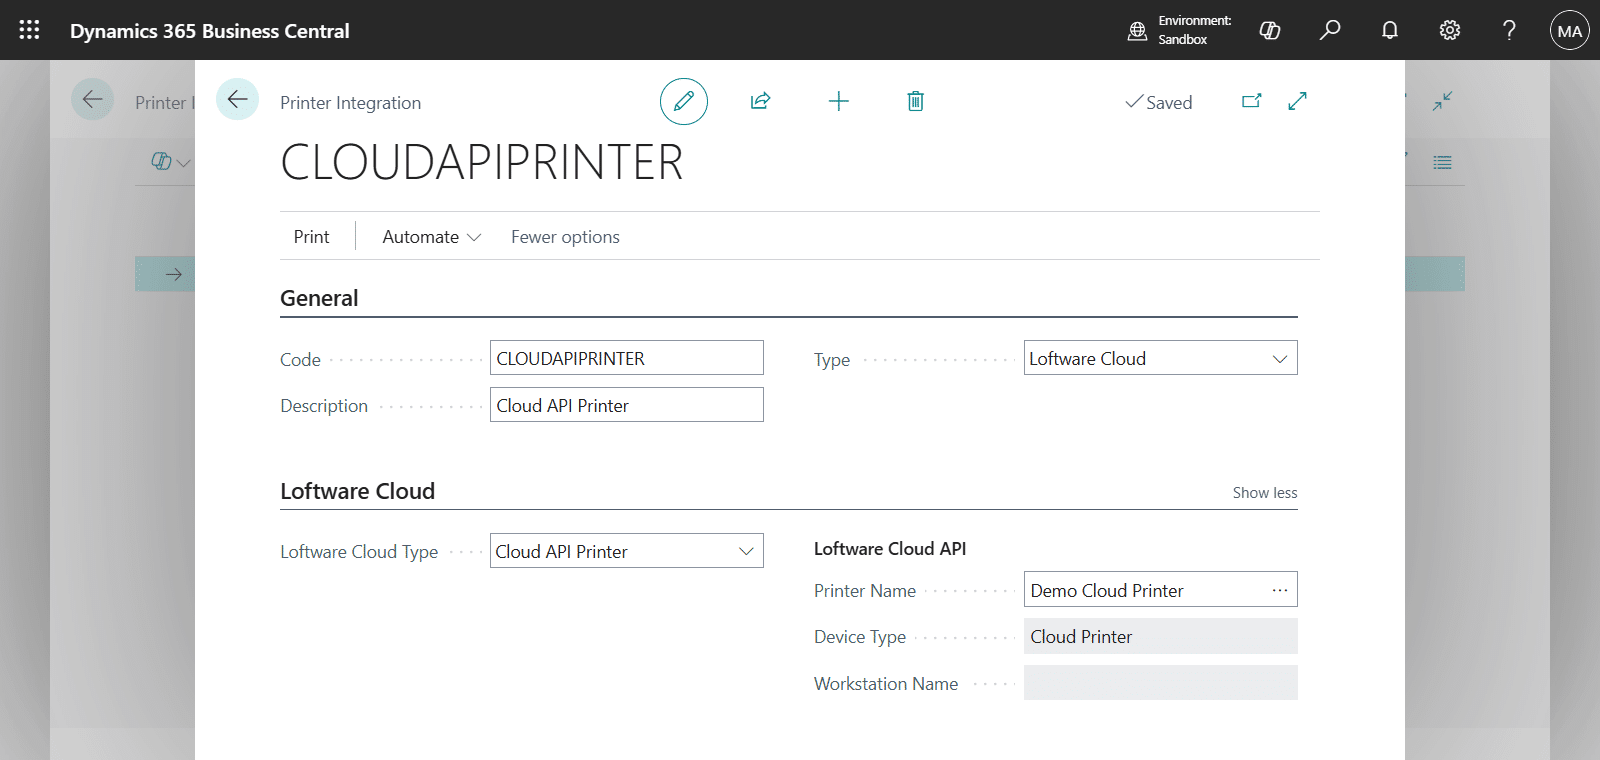
- For the Cloud Printers, the Workstation Name is blank because this printer type is not connected to a local server or a workstation. This field only applies to Printer Queues.
- For the Cloud Printers, the Workstation Name is blank because this printer type is not connected to a local server or a workstation. This field only applies to Printer Queues.
- You have now successfully linked the Loftware Cloud printer.
| Field | Description |
|---|---|
| Printer Name | Specifies the name defined in the Loftware Cloud Control Center for the registered printer. |
| Device Type | Select “Show more” to view this field on the Printer Integration card. This field is not editable. Specifies the device type of the printer. Cloud Printer refers to printers with built-in cloud printing capabilities. Print Queue refers to other network printers. |
| Workstation Name | Select “Show more” to view this field on the Printer Integration card. This field is not editable and only applies to the Print Queue type. Specifies the name of the workstation where the printer is installed. |