A Fenwick Apps Account links your subscription licenses to your system.
If you’re using a Microsoft-hosted SaaS version of Business Central, please see Creating your Fenwick Apps Account.
Step 1. Link your service tier to your Microsoft Entra tenant
The Service Tier needs to be configured to connect to your Microsoft Entra tenant. You will need to have an Microsoft Entra tenant active for your organization first.
If you already use Microsoft 365 authentication for your on-premises instance of Business Central, then you don’t need to re-do this step.
This section is a shortened version of the Single Sign-On guide by Microsoft. You may wish to reference this guide for more information about specific values.
You can get your Tenant ID from the Entra Properties page for your tenant.
- Open the Business Central Administration tool.
- Select your instance from the left hand side.
- Under the Azure Active Directory (Azure AD) section, update the WS-Federation Login Endpoint to the following value (replacing [TENANTID] with your Tenant ID):
https://login.microsoftonline.com/[TENANTID]/wsfedOr, you can directly add/update the value in the CustomSettings.config:<add key="WSFederationLoginEndpoint" value="https://login.microsoftonline.com/[TENANTID]/wsfed" /> - Save the file and restart the service tier.
For multi-tenanted deployments, the Tenant ID is set as part of the tenant mounting procedure.
Step 2. Starting the create account wizard
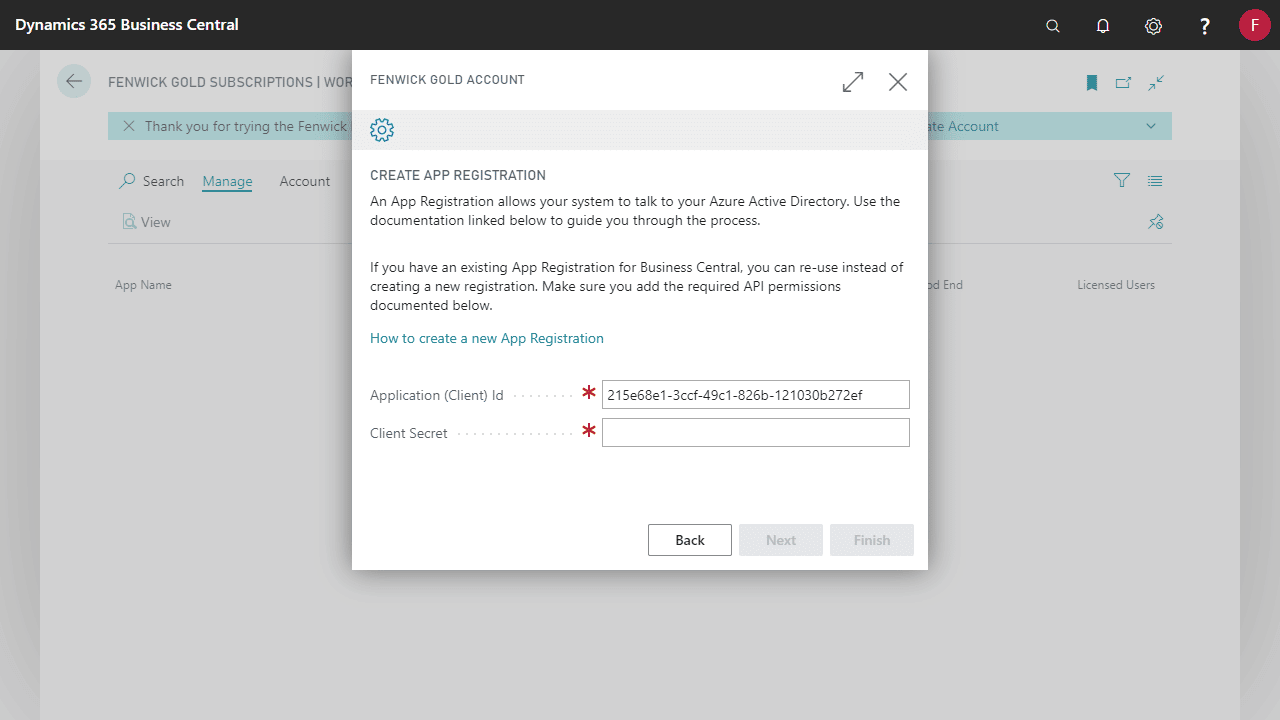
The steps in this guide work along with the Create Account wizard within Dynamics 365 Business Central. Throughout the guide you’ll need to copy and paste some values back into the wizard.
You can access this Assisted Setup, or by clicking Create Account on the Fenwick Apps Subscriptions page.
Step 3. Creating the App Registration
An App Registration will need to be setup on your Entra tenant to allow Fenwick Apps Account to securely communicate with our billing service.
These steps are based off the detailed Microsoft guide to help you set up a new App Registrations on your Entra tenant.
- Create one App Registration for both LIVE and TEST environments.
- You can use an existing app registration if it has already been setup for your Business Central app (skip to step 4). Don’t create another app registration.
Fenwick or your IT may complete these steps for you using a CSP/delegated admin account.
- Open your Entra Portal as an administrator.
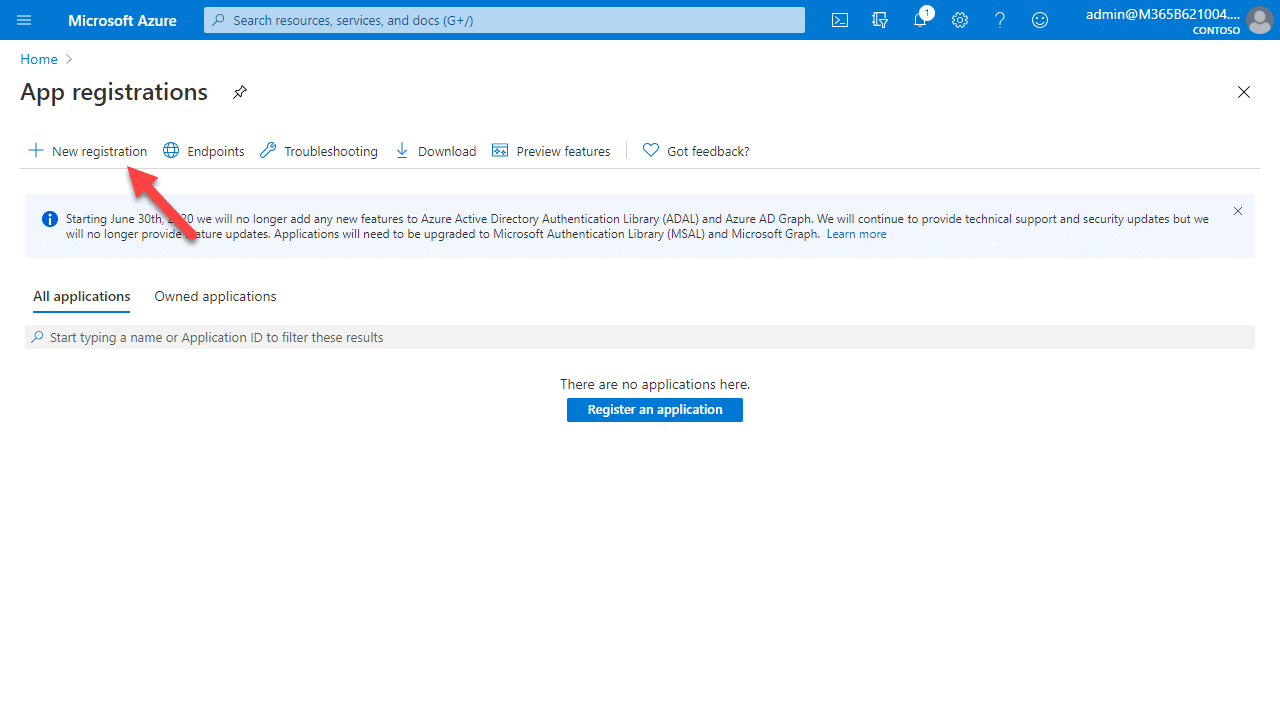
- Click on New registration in the App registrations page.
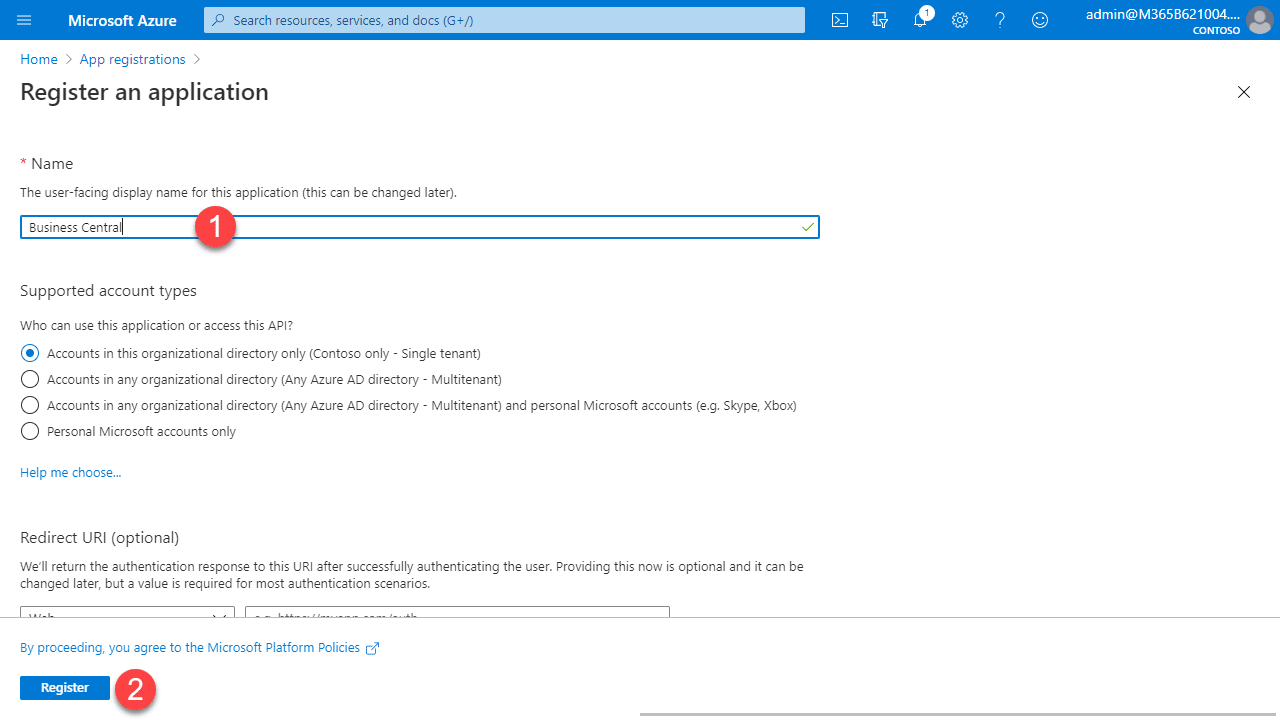
- Provide a Name (i.e. Business Central Fenwick Gold Account) for the app registration and click on Register.
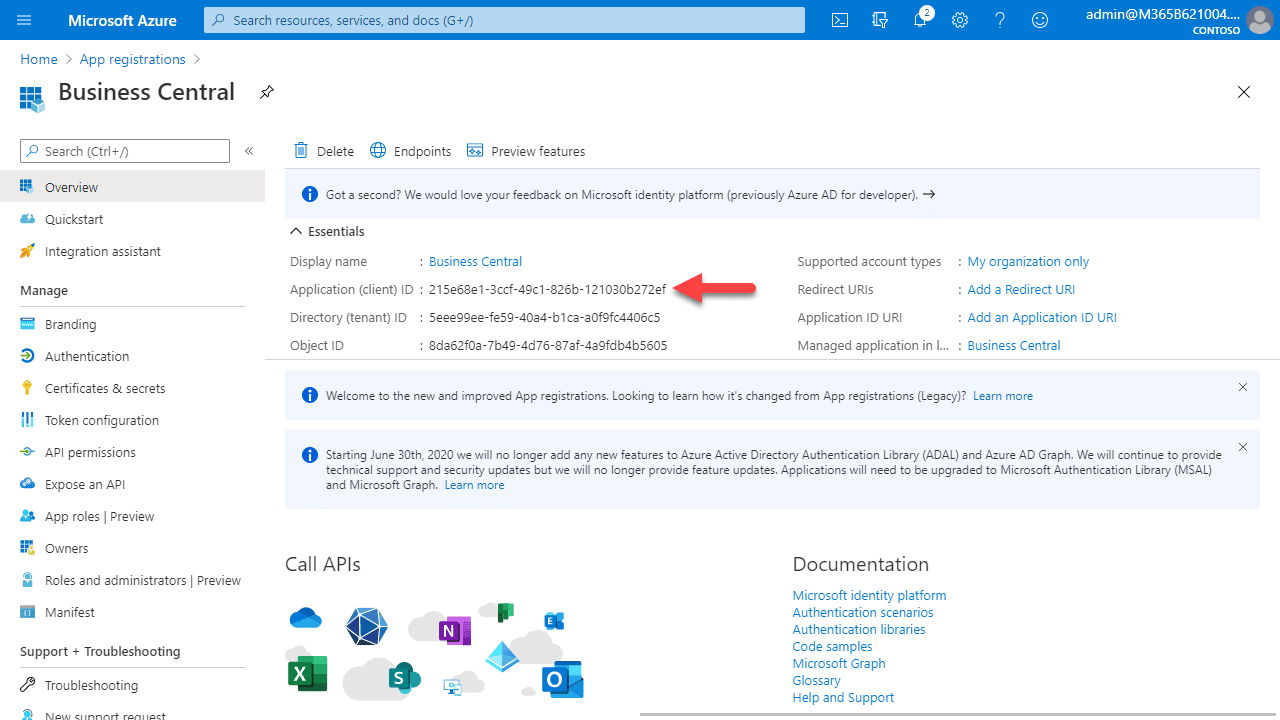
- Copy the Application (client) ID value and paste it in the Fenwick Apps Account wizard.
Step 4. Create a Client Secret for the App Registration
A client secret allows Fenwick Apps to securely communicate with the Fenwick Apps Account application installed on your Business Central.
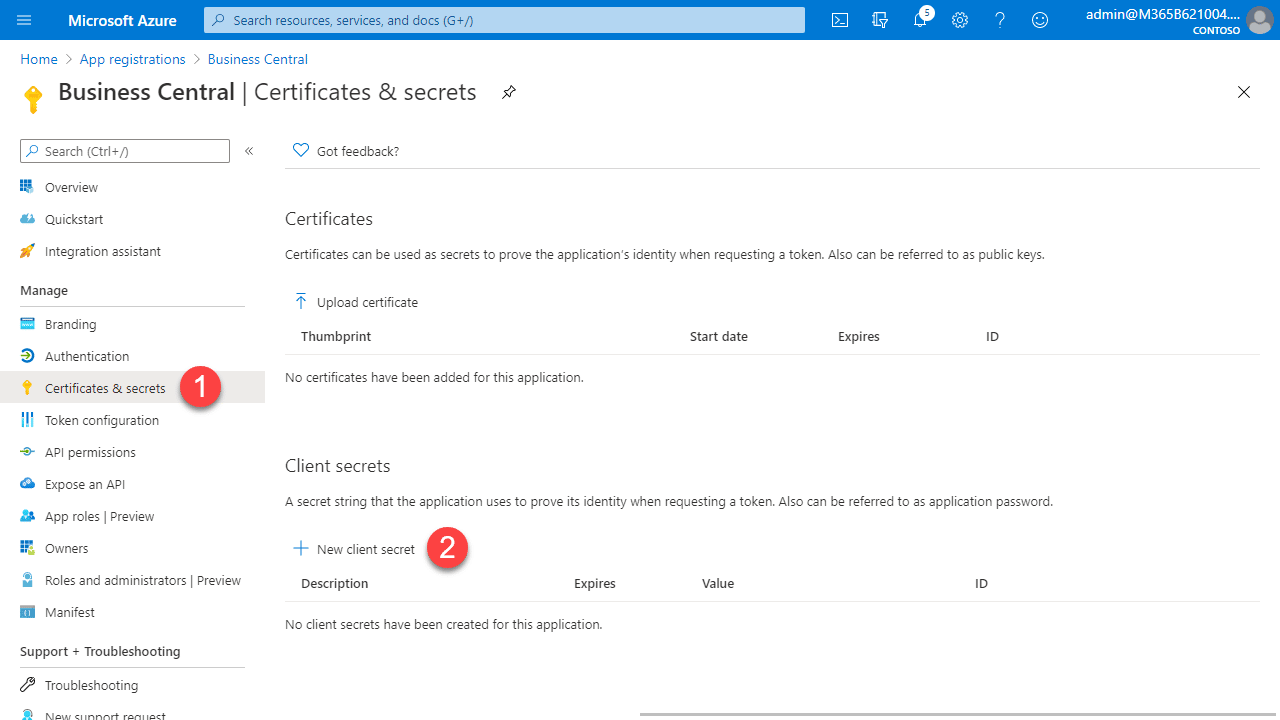
- Select Certificates & Secrets for the app registration and click on New Client Secret.
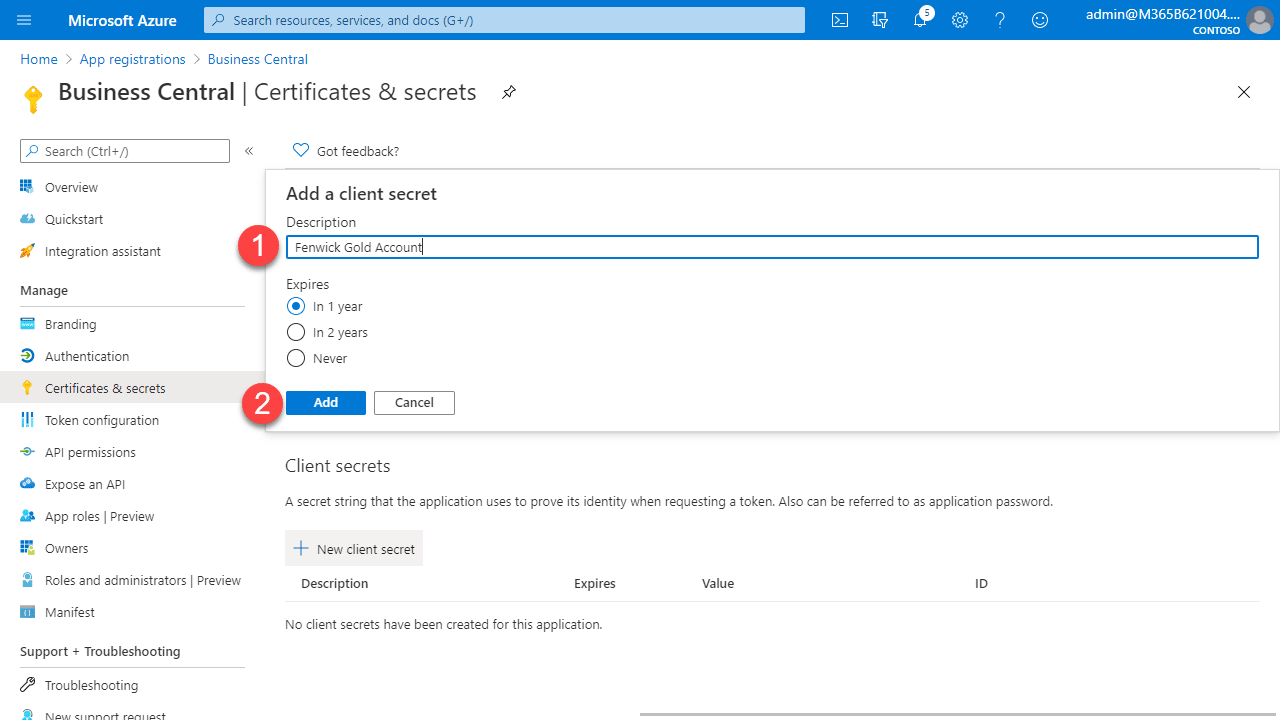
- Provide a Description for the secret and click on Add. We recommend noting down the secret expiry date in your calendar so you can renew it when required.
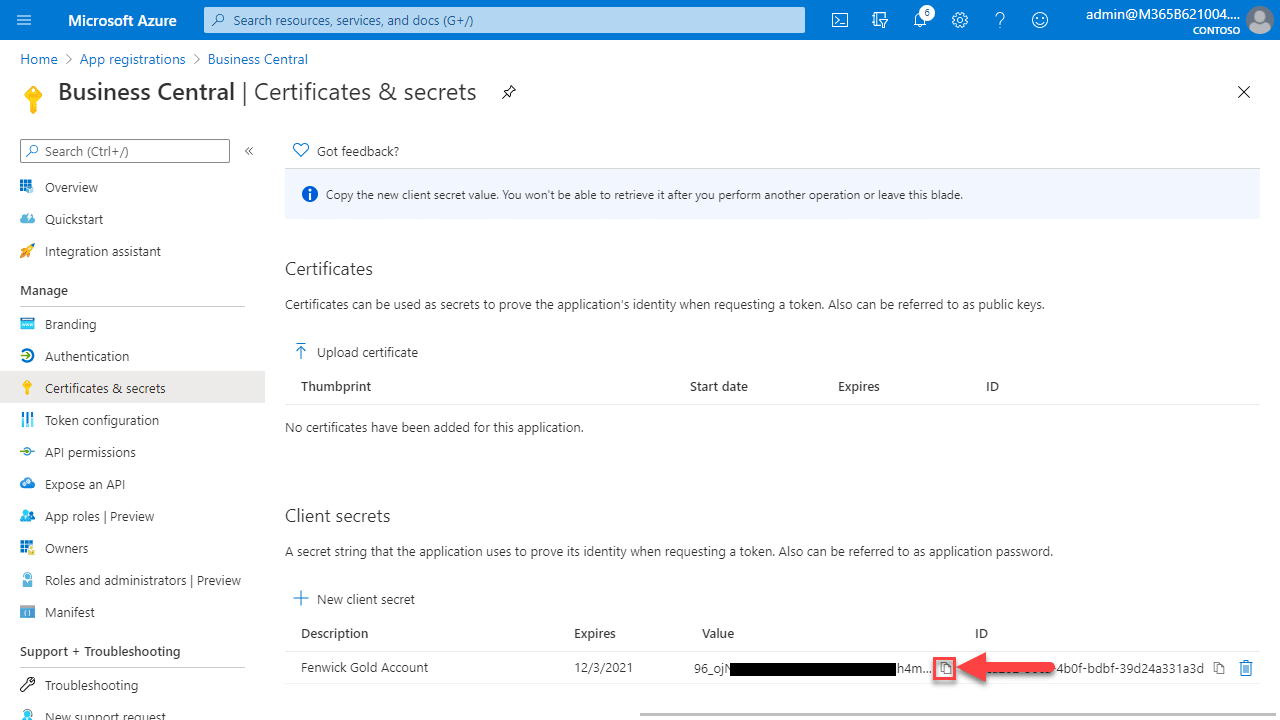
- Copy the value using the copy button and paste it in the Fenwick Apps Account wizard Client Secret field. Then click Next to proceed.
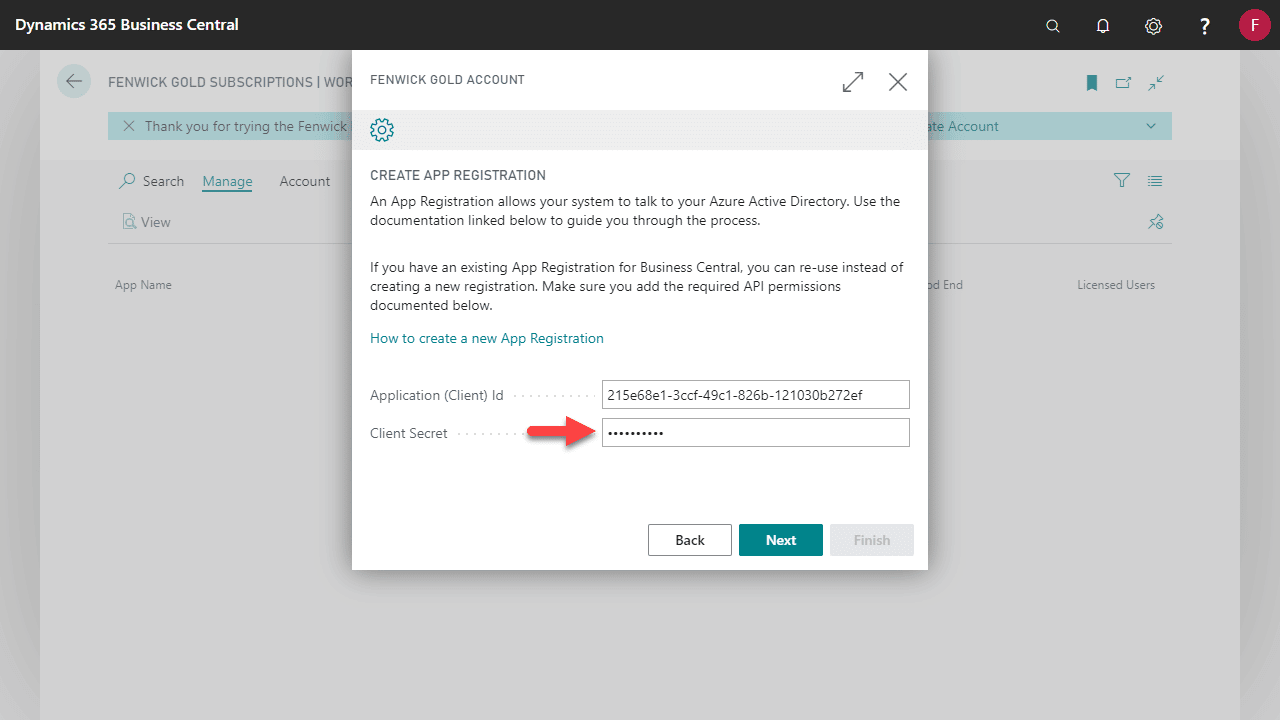
- Click Next.
Step 5. Configure the App registration with the correct API permissions
API permissions are required to authenticate communications between Business Central and your Entra Directory.
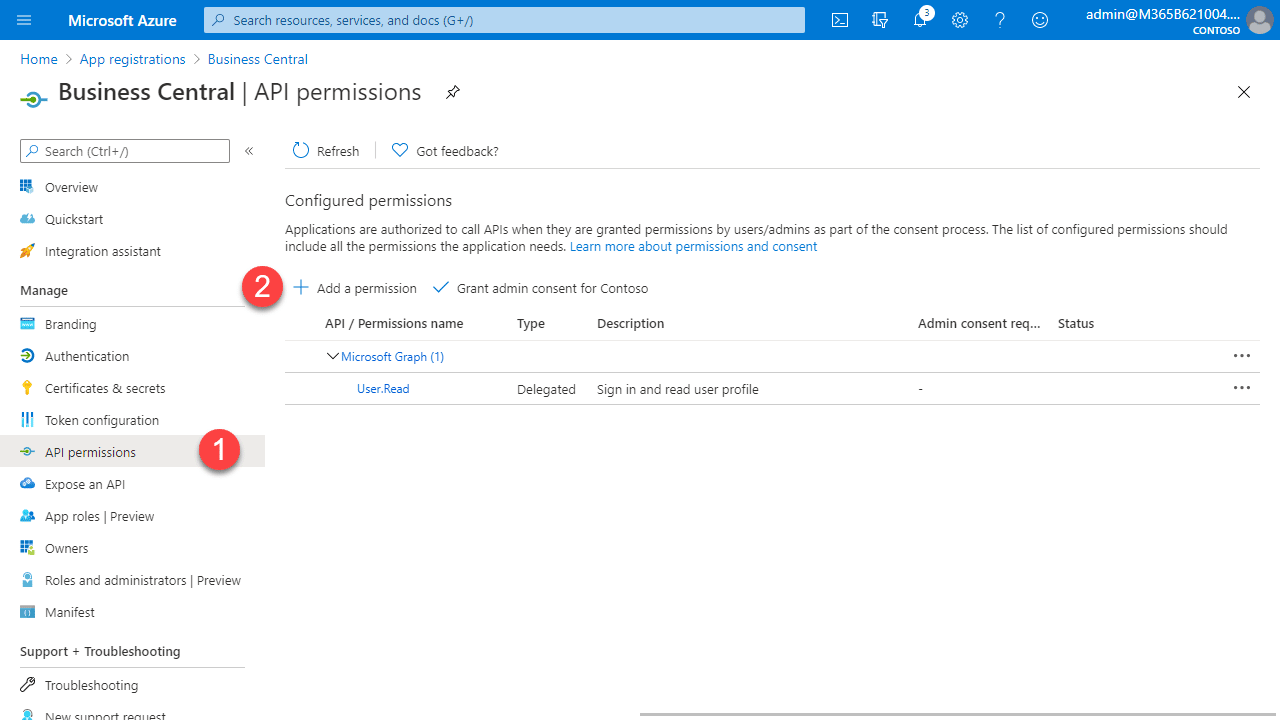
- Select API Permissions for the registered app and then click on Add a Permission.
- In the section APIs my Organization uses, locate Fenwick Apps Account.
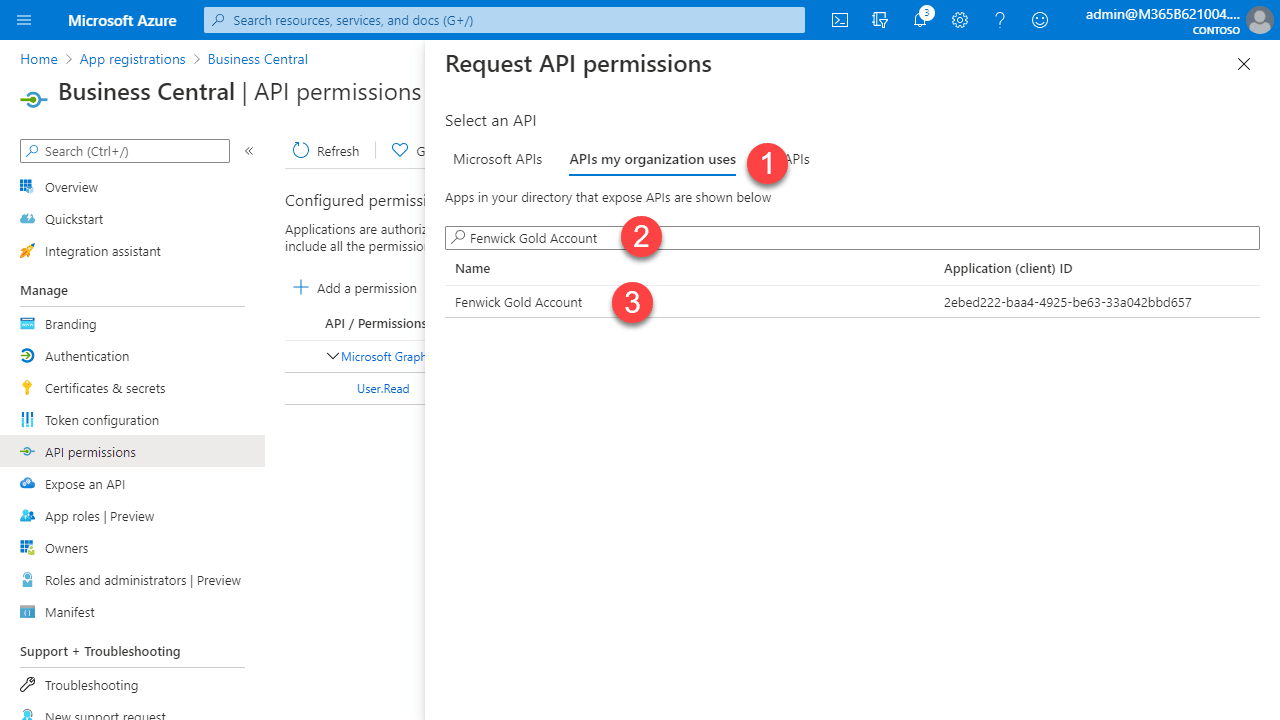
If you can’t see Fenwick Apps Account:- Double check you’re searching for “Fenwick” and not just “Apps”.
- Make sure you have completed the Fenwick Apps Account registration wizard while logged in to your companies Entra ID tenancy, otherwise the App will be in the wrong tenancy. Delegated admins will not work.
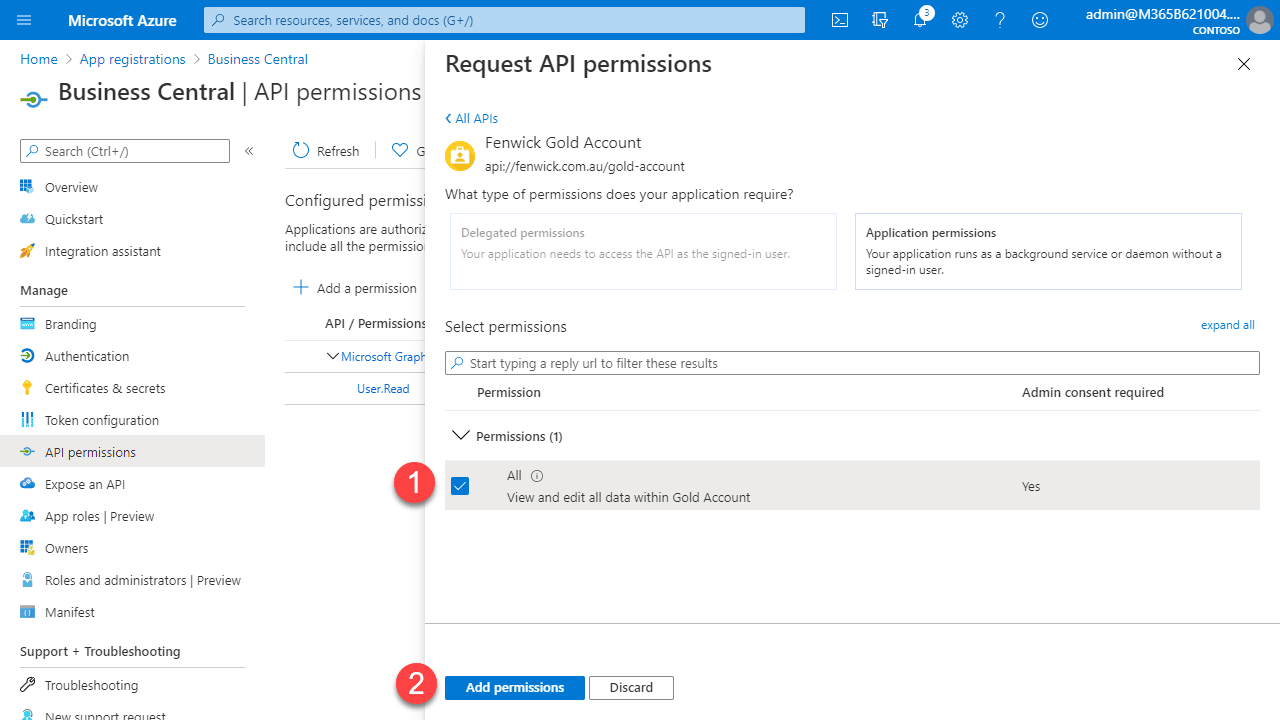
- Select All permissions and click on Add permissions
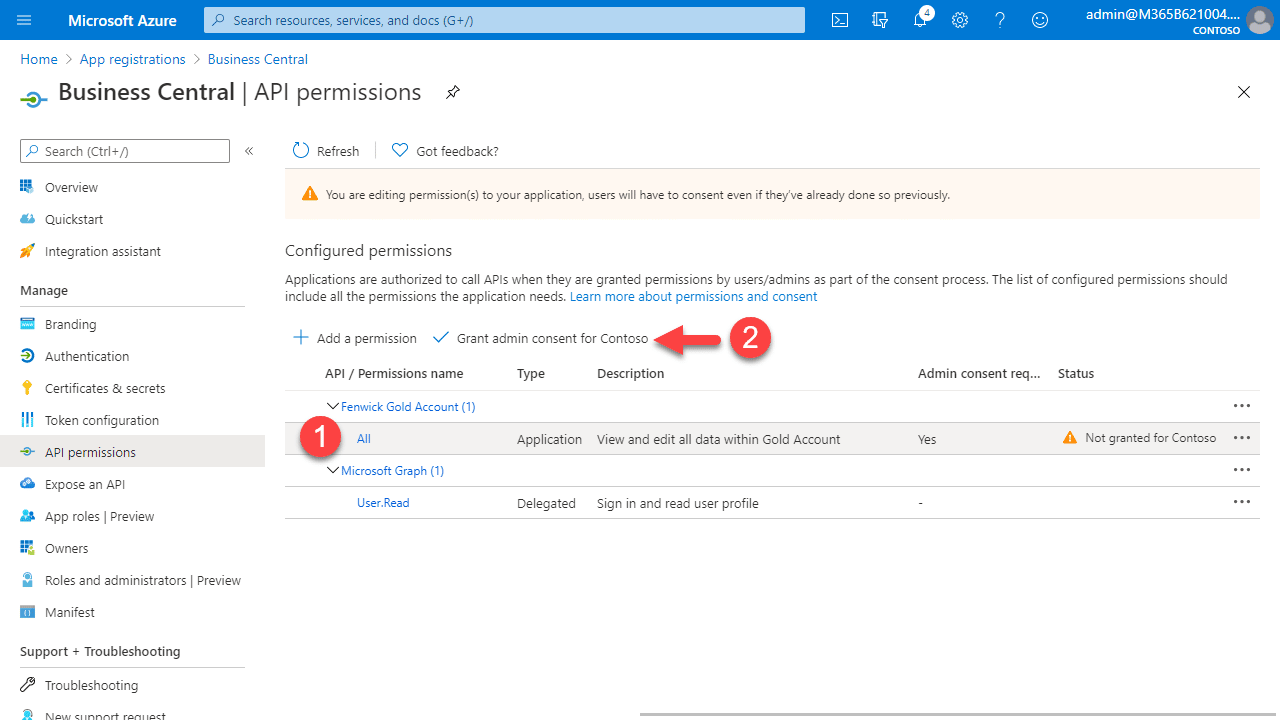
- Select the API/Permission Name and grant it Admin Consent.
- Click Next in the Fenwick Apps Account wizard.