- Install the data connector apps in Business Central
- Install the Fenwick Gold for Power BI Apps in your Power BI Service
Part 1. Install the data connector apps in Business Central
These steps ensure Dynamics 365 Business Central is ready to export data to Fenwick Gold for Power BI
- Install the Connector apps via either Business Central or AppSource
- If you haven’t already done so, create a Fenwick Gold Account.
- Go to the Fenwick Gold Subscriptions page and click Start Trial for each data connector app you’ve installed, then follow the prompts to complete the trial registration.
- Complete Fenwick Gold Assisted Setup for Power BI
Part 2. Install Fenwick Gold for Power BI Apps in your Power BI Service
These steps install and connect the Fenwick Gold for Power BI apps to your Business Central database.
- Navigate and log into your Power BI Service (https://app.powerbi.com)
- Click Apps in the navigation pane
- Click Get apps in the top right-hand corner of the page
- Search for Fenwick Gold and select the desired App
- Click Get It Now
- Click Install
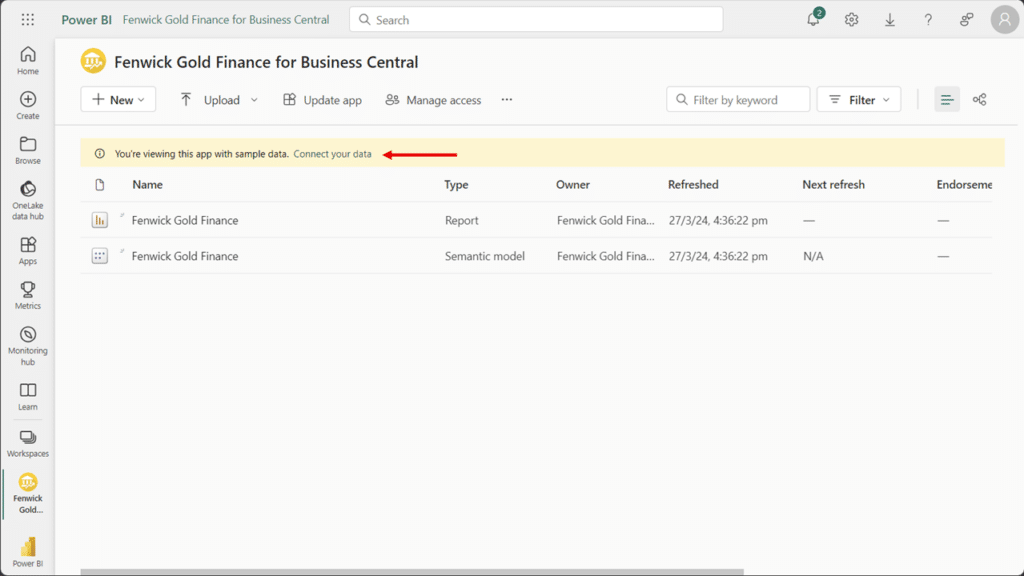
- Go to the newly created Fenwick Gold workspace. For this example, we have installed Fenwick Gold Finance
- Click Connect your data.
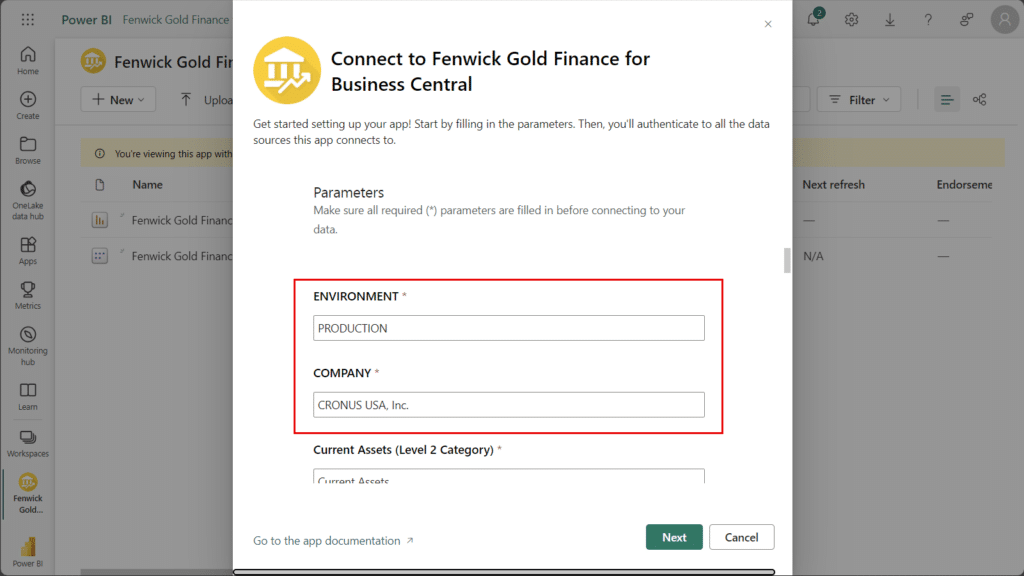
- Set the ENVIRONMENT and COMPANY parameters. These values can be found on the Fenwick Gold Setup for Power BI page in Business Central under Connection Details.
- Authenticate the connection