This article will guide you through the steps for setting up and managing printers used in Print-It with Cloud Companion.
Adding a new printer
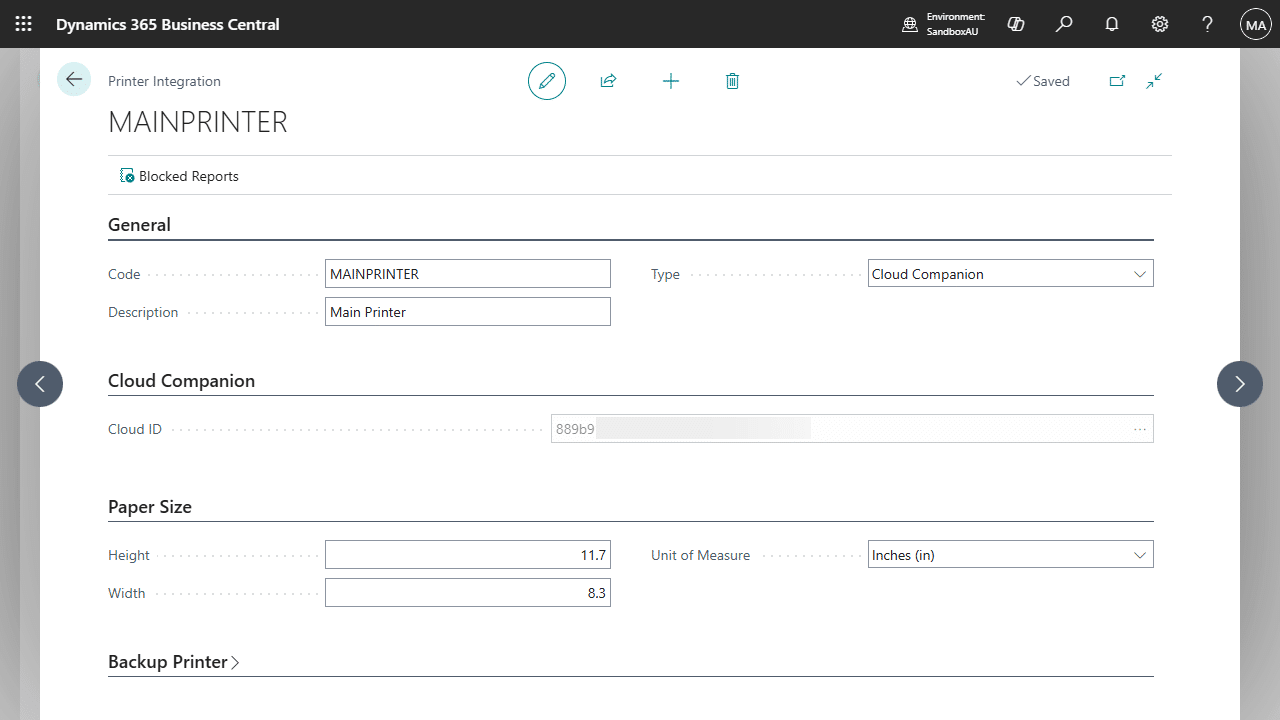
The Printer Integration page allows you to define and manage your on-premises printers integrated to Business Central that are connected via Fenwick Cloud Companion service.
- Open the Printer Integrations page via the Search box
- Choose New from the action bar
- Fill out the Code and Description fields, and then select Cloud Print on the Type field
- Set the Cloud ID to match your printer
- An additional section for Cloud Companion will now appear on the page. Choose the ellipsis icon on the field to open the list of your printers from Fenwick Cloud Companion service. If you are unable to open the dialog, please make sure that you have set up Print-It with Cloud Companion correctly.
- Select a printer and then choose OK on the dialog
- The ID of the selected printer will be automatically filled in the field
- Optionally, you can specify a custom width and height of the printouts.
Managing printers via Printer Management
The Printer Management page provides an alternative way to shows all printers that have been set up in Business Central.
However, the records on this page cannot be inserted or modified directly. Print-It with Cloud Companion integrates with this page enabling you to manage these records.
Changing a printer
- Locate and open the Printer Management page
- Choose the Edit printer settings action from the action bar or simply drill down on the Printer ID on the chosen record.
- Modify the printer details as you wish on the Printer Integration card page.
Deleting a printer
- Locate and open the Printer Management page
- Choose the Edit printer settings action from the action bar or simply drill down on the Printer ID on the chosen record.
- On the Printer Integration card, choose the trash bin icon at the top to delete the current printer record.
Backup printer
The backup printer acts as a fallback option when the primary printer is unavailable or encounters issues. Here are common scenarios for using the backup printer:
- Printer Downtime: If the primary printer is undergoing maintenance or is temporarily unavailable, enabling a backup printer ensures that print jobs continue without interruption.
- Avoiding Print Queue Issues: Some reports or documents may cause issues with the primary printer such as dimensions or formatting. Configuring a backup printer prevents these jobs from getting stuck in the queue.
- High-Volume Printing: In environments with high printing demands, a backup printer can serve as a fallback to handle overflow when the primary printer is overloaded.
- Disaster Recovery: In critical operations, having a backup printer ensures business continuity in case of unexpected printer failures.
When the primary printer is enabled:
- The Cloud ID is the default printer where all print jobs are sent.
- If the primary printer is functioning correctly, all labels and documents will be printed on this printer.
- The backup printer is ignored unless explicitly enabled and required.
When the backup printer is enabled:
- The Backup Printer is used if the primary printer becomes unavailable.
- When enabling the backup printer, print jobs will automatically be redirected to the backup printer.
- The backup printer must be configured and enabled manually.
Configuring the backup printer
- Search for and open the Printer Integrations page,
- Select the printer integration you want to configure,
- Under the Backup Printer tab, select “Enable Backup Printer”.
- When this option is enabled, the Cloud ID field will become read-only and cannot be edited.
- Select the backup printer by choosing it from the Backup Printer ID field.
- Once the configuration is complete, you can disable the Enable Backup Printer option. Otherwise, leave it enabled to use the backup printer as a fallback.

More Information
For more information on printing reports using Print-It with Cloud Companion, see the articles below:
Print-It with Cloud Companion also works with Print-It with NiceLabel which enables label printing in Business Central.