Bank Statement Imports have been improved with a set of new features. Imports now handle more file formats (multiple footer lines for Westpac files, Line Feeds as line separators) to help make importing bank statements easier.
Setting up a Bank Statement Import Format
There are several pieces to setting up the Bank Statement Import. To begin:
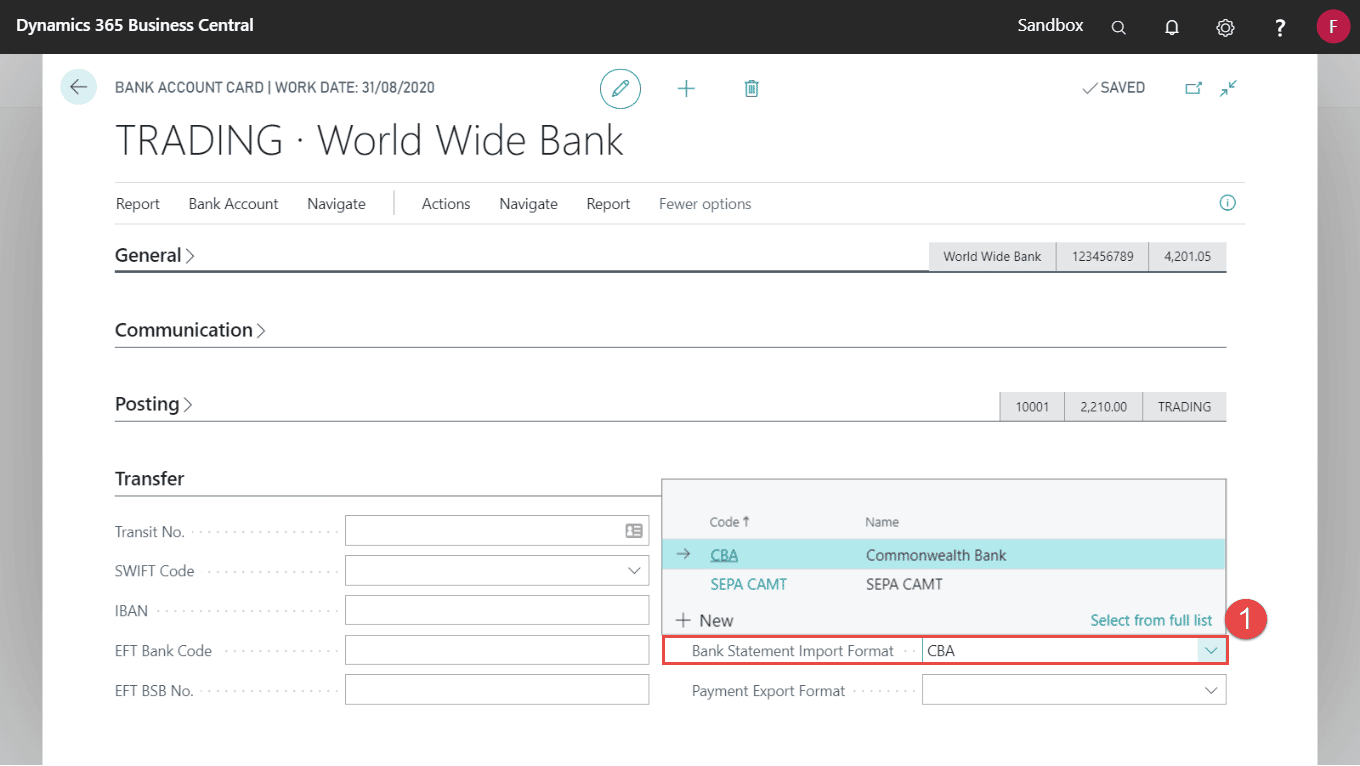
- Open the Bank Account card
- Locate the Bank Statement Import Format field and select New or go to the Full list and Edit an existing record.
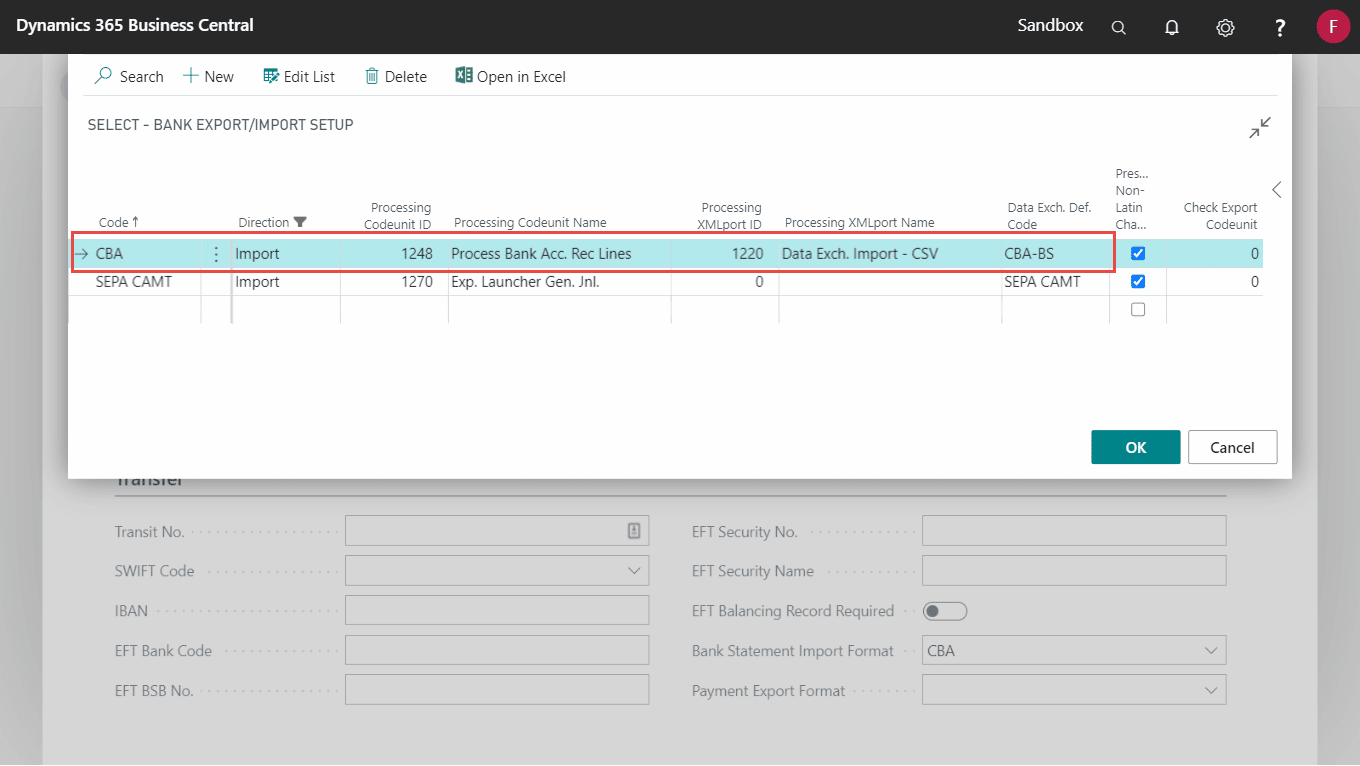
- Create a Bank Export/Import Setup record and enter (for example):
| Field | Recommended setup |
|---|---|
| Code | Specifies a code for the setup. Example: CBA for Commonwealth Bank of Australia |
| Name | Specifies the name for the setup. |
| Direction | Select Import to allow bank file import. |
| Processing Codeunit ID | Select one of the following options:
|
| Processing XMLport ID | Select 1220 – XMLPort “Data Exch. Import – CSV” to allow importing of CSV files. |
Setting up a Data Exchange Definition
- Lookup of the Data Exch. Def. Code field from the Bank Export/Import Setup record. The lookup page for Data Exchange Definition has been improved in this app for easier navigation.
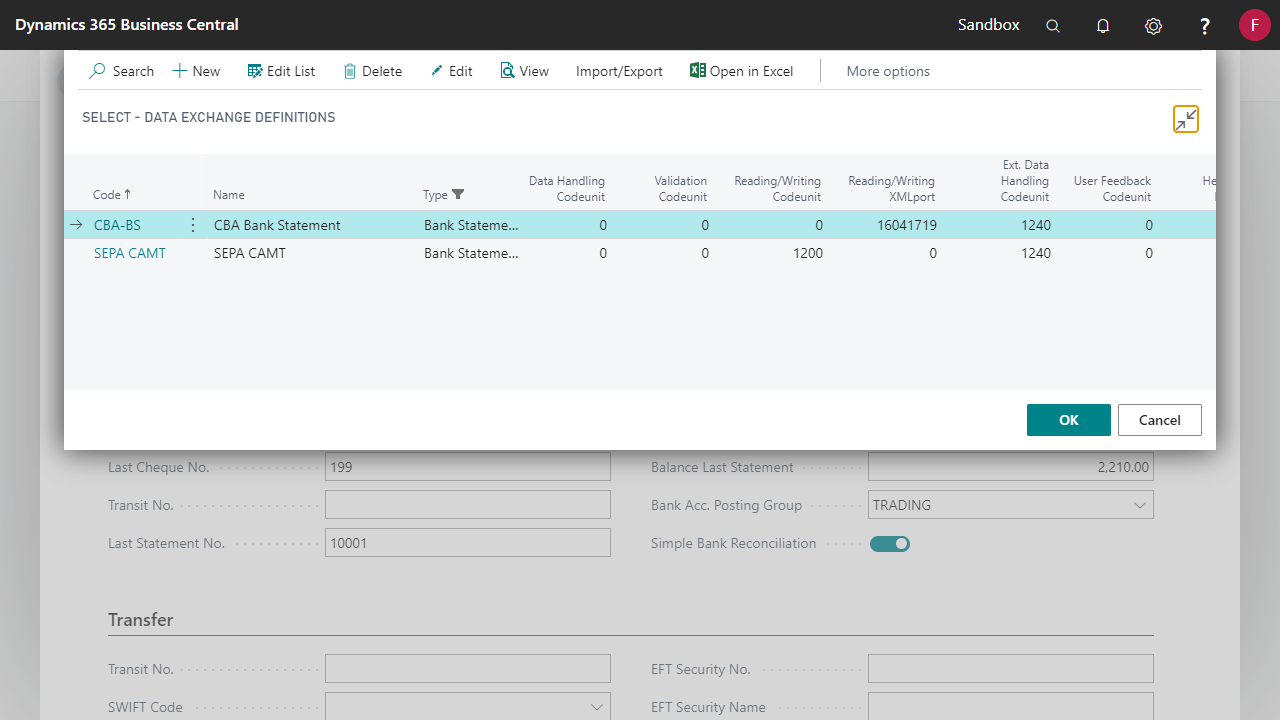
- Select New opens the Data Exchange Definition card page, select Show More to expand the General tab and enter the required fields as shown below:
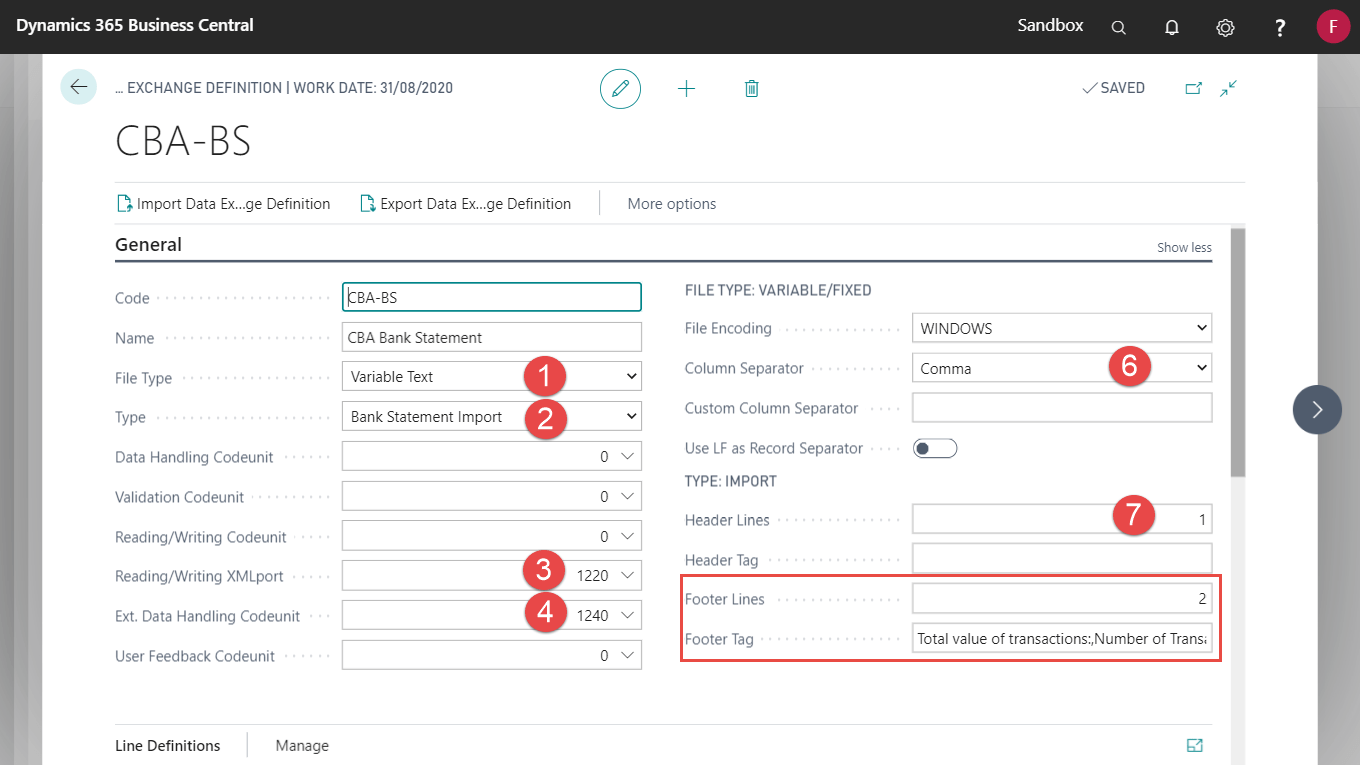
Field Recommended setup File Type Select Variable Text for CSV import, alternatively you can select other options based on your file type. Type Select Bank Statement Import for for processing bank account reconciliation lines. Reading/Writing XMLPort Select 16041719 – XMLPort “Data Exch. Import – CSV (Supports Multiple Footer Lines)” for importing CSV files. Ext. Data Handling Codeunit Select 1240 – Codeunit “Read Data Exch. from File”. Column Separator Select Comma for CSV files. Header Lines Specifies how many header lines exist in the file. This ensures that the header data is skipped and not imported. This field is only relevant for import.
This value is usually 1 unless you have more header rows in your data file. - You can now define multiple Footer Lines. When using multiple footer lines, the Footer Tag field should contain multiple commas separated tags (one for each line).
- If your data file contains lines LF (Line Feed) as a record separator, then you should enable Use LF as Record Separator. This typically occurs if you are using a Linux or Mac OS.
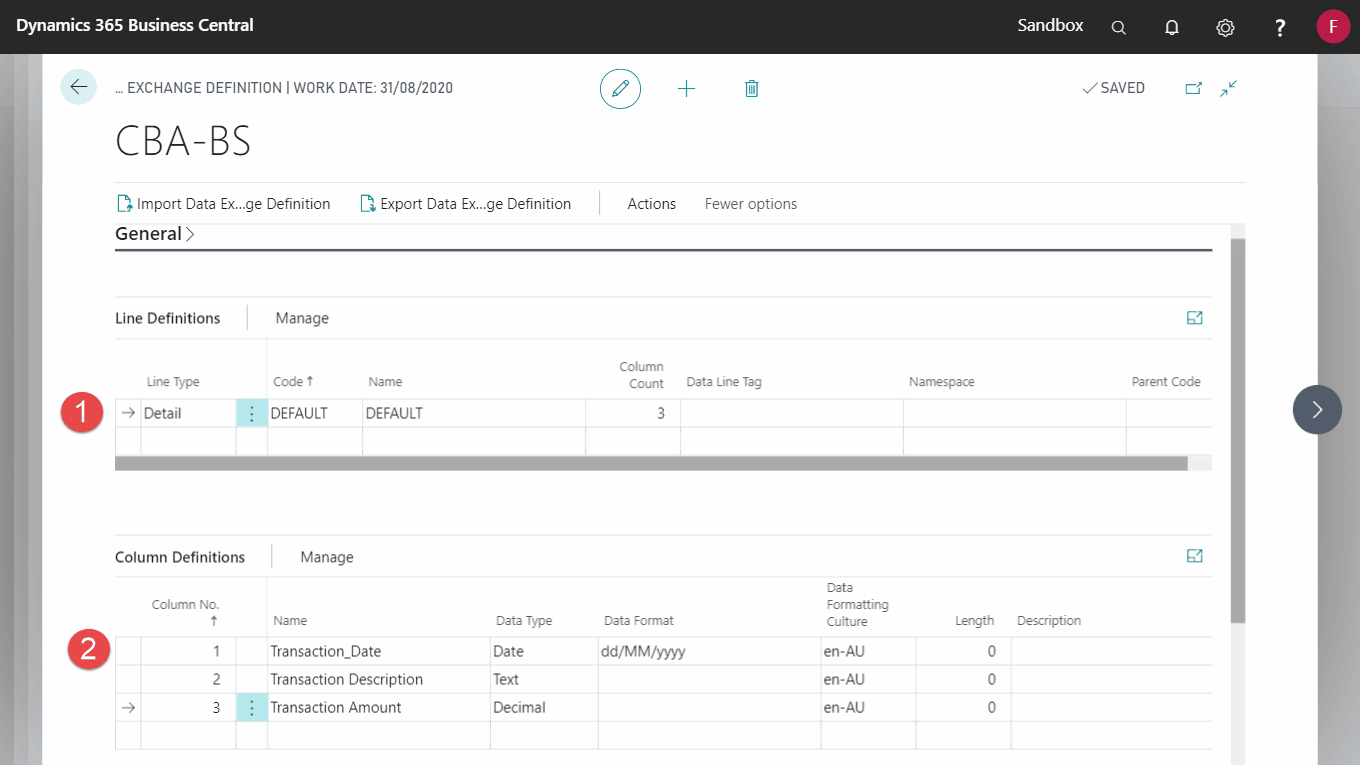
Create the Column Definitions
- Locate the Posting Line Definitions area and enter Default as the Code value, along with the number of columns that you will be importing.
- Scroll down to the Posting Column Definitions area and enter each column as a new line. You will need to fill out:
- Column No.
- Name
- Data Type
- Data Format (Ensure that for month, capital M’s are used. If a ‘mm’ value is used instead of ‘MM’, all months are set as January).
- Data Formatting Culture
Add Field Mapping for Line Definitions
Once this has been done, you need to map these columns to the actual fields which reside against the Bank Acc. Reconciliation Lines. To do this:
- Open the Field Mapping page via Line Definition.
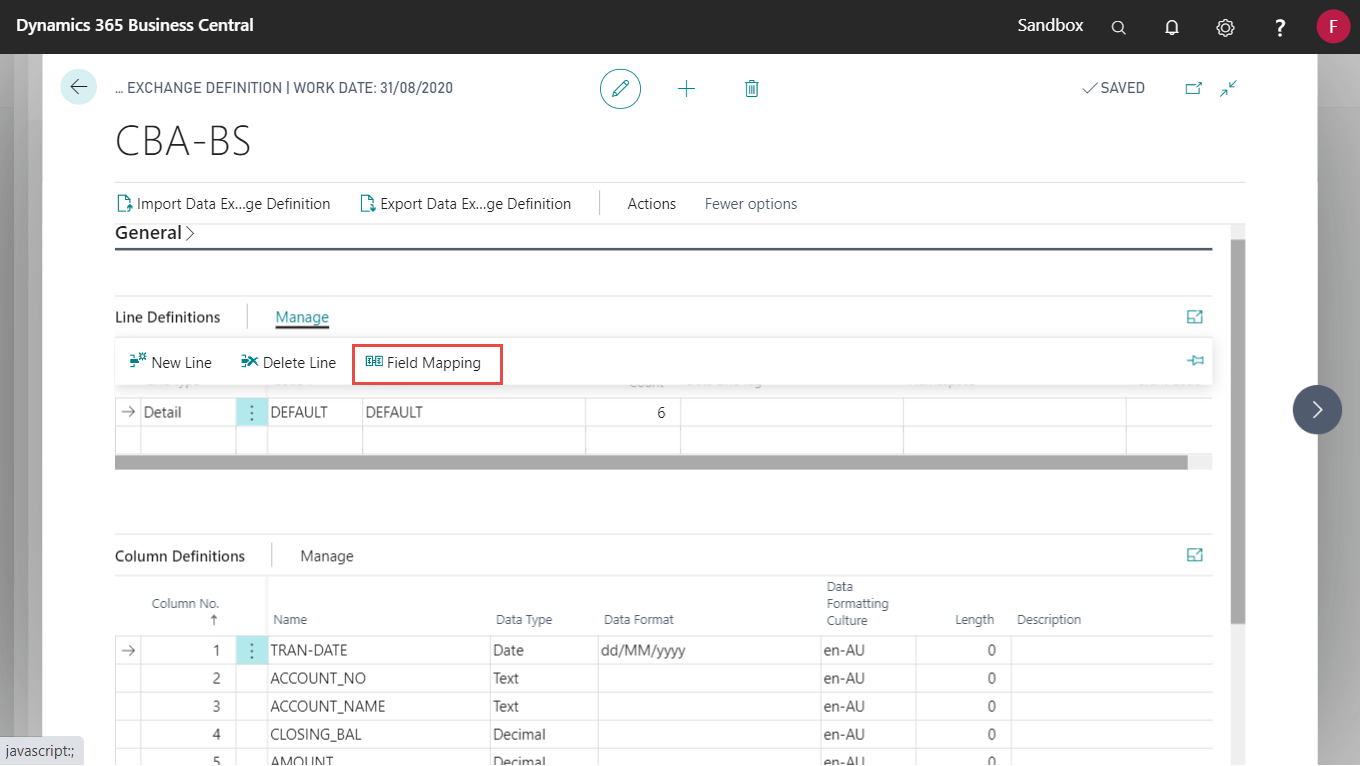
- Enter the information shown below.
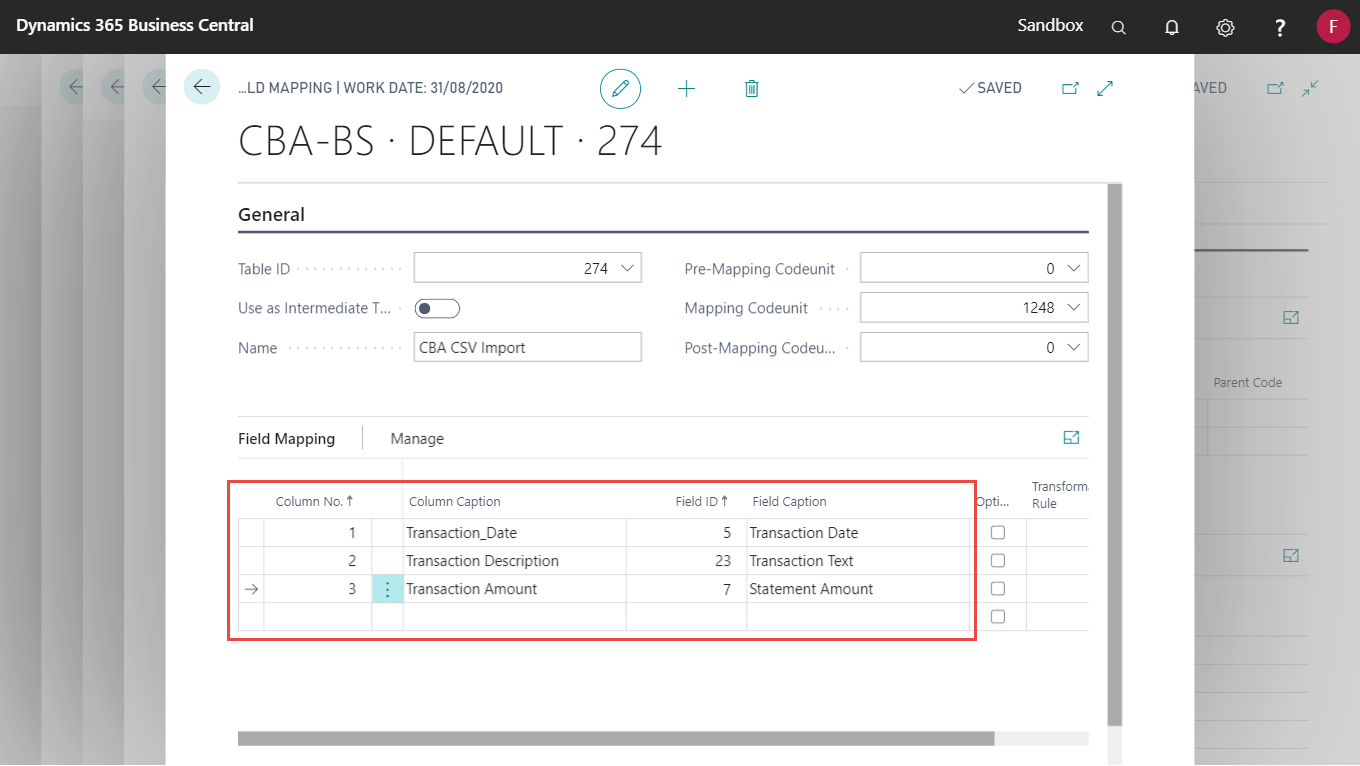
Field Mapping Tips:
- Show ‘Multiplier’ column within lines to change amount sign to negative. Use ‘-1’ as file value. This can be used if the Bank Statement has separate columns for Debit and Credit figures.
- By selecting Field ID 23 in the Field Mapping above, you can also import your Bank Transactions into the new Payment Reconciliation Journal functionality.
Transformation Rules for Field Mappings
Use the Transformation Rule functionality to correct data format errors without making code modifications. You can chain multiple transforms to ensure the data is correct.
For example, an import is setup to use ddMMyyyy as the date format, but the file contains the value 9122018 as the date (missing leading zero). The system will try to convert this into ddMMyyyy and will fail. A simple transformation rule using regex replace can correct this at the time of import.

Importing your bank statement
You can now go to your Bank Account Reconciliation card page and upload your bank statement using the Import Bank Statement action.