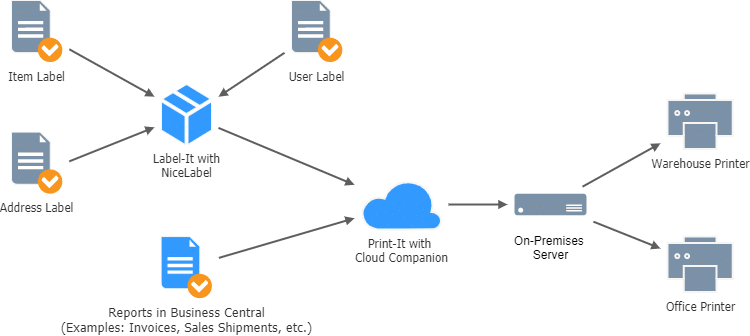
Cloud Companion connects you on-premises resources to Business Central via the Fenwick Cloud Companion online service.
Requesting your Client Key
Before you can use the app in Business Central, you will need to contact our support team and provide your Client ID so we can send you an installation package to be installed on your on-premises server.
- Ensure that you have the app installed in your Business Central environment
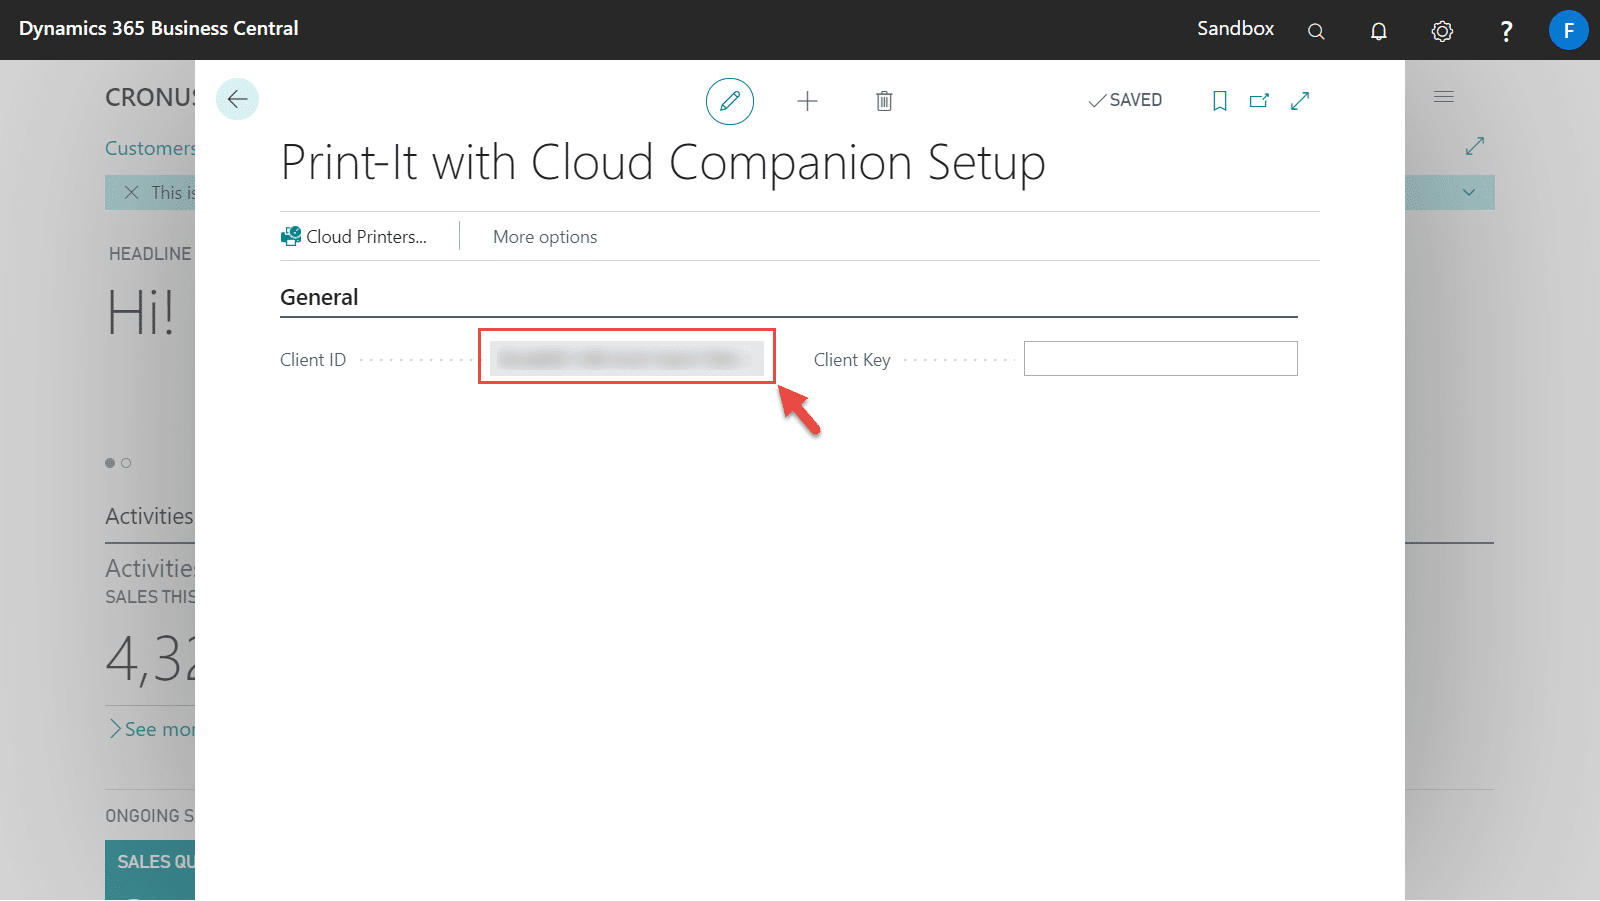
- Open the Print-It with Cloud Companion Setup page via the Search box
- On the setup page, copy the Client ID (which is a GUID value) and send it to our support team
We will then provide the installation package together with the Client Key for connecting to Fenwick Cloud Companion service in Business Central, and then follow this article to set up the Cloud Companion (Server Edition) agent.
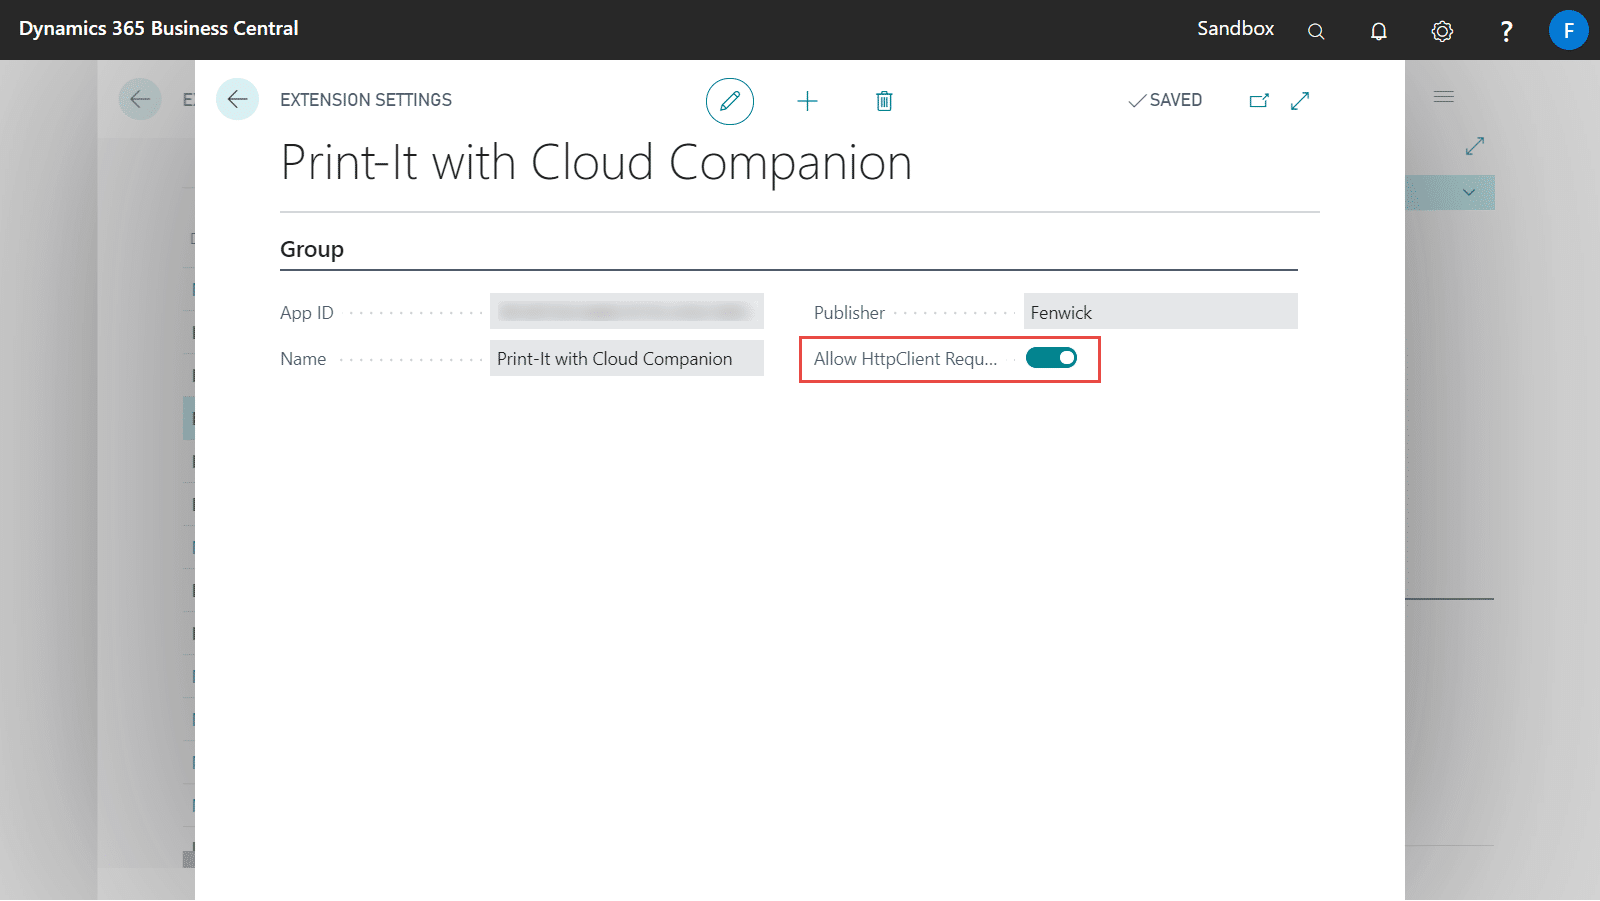
Allowing the extension to make external web requests
The extension must be able to make external HTTP requests to the Fenwick Cloud Companion service from Business Central. To enable this:
- Open the Extension Management page via search
- Navigate to the Print-It with Cloud Companion extension on the list. Select the ellipsis icon on the record and then choose the Configure action
- Enable the Allow HttpClient Requests option
Setting up Print-It with Cloud Companion for the first time
- Open the Assisted Setup page via search
- On the Assisted Setup list page, choose Set up Print-It with Cloud Companion
- Continue past the introduction using the Next action
- The Client ID field will automatically populated based on your current Azure environment. Enter the Client Key that we have provided back to you, then choose the Next action.
If you have not received a Client Key, please contact Fenwick for assistance.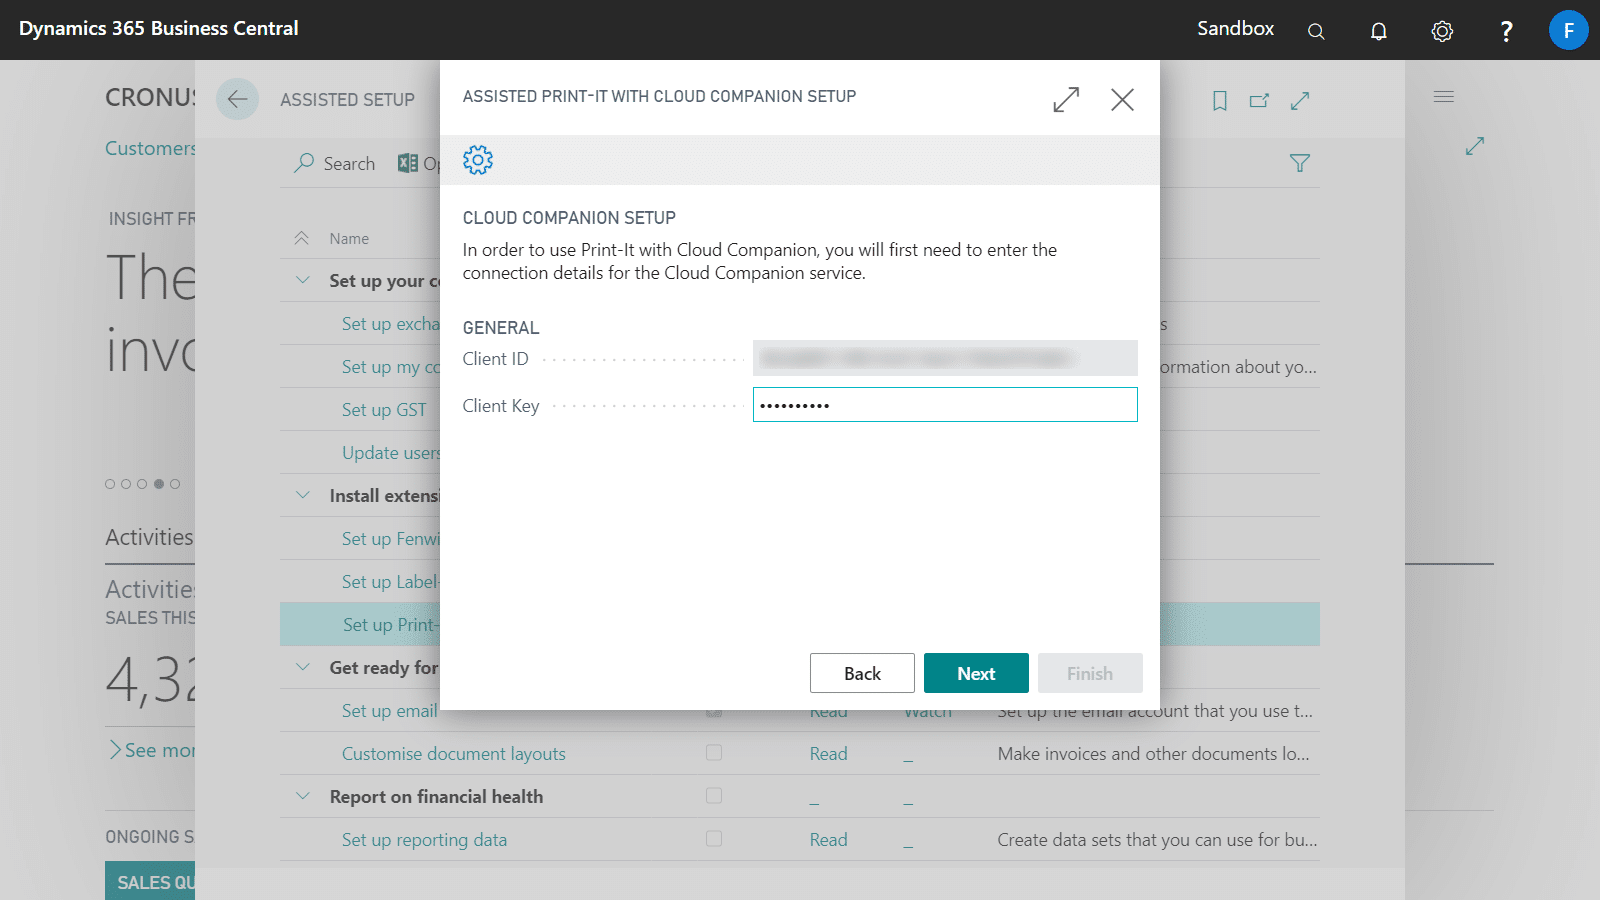
- In this step, you will set up the initial printers that you want to use for printing reports or labels in Business Central.
- Fill out the Code and Description values for the printer, and the choose the ellipsis option on the Cloud ID field
- A dialog will appear on the screen. On the Cloud Printers dialog, choose your on-premise printer for the printer integration and then choose OK
- The Cloud ID will be automatically filled with the ID of your selected printer.
- Repeat step 5 if you wish to set up additional printers or choose Next when finished. You can always set up or edit the printers later
- Choose Finish to complete the wizard.