Attachments in Business Central are a quick and easy way to store related files such as PDFs and images to records such as Sales Orders or Items. However, these files are large compared to all your other Business Central data it’s stored with. Over time, this can lead to performance issues as your database size increases, potentially even exceeding the storage capacity limit and costing extra.
Attach-It allows you to mass transfer these files to an external storage solution, reducing the burden on your database, reducing costs and increasing performance in Business Central.
1. Identify what you want to migrate
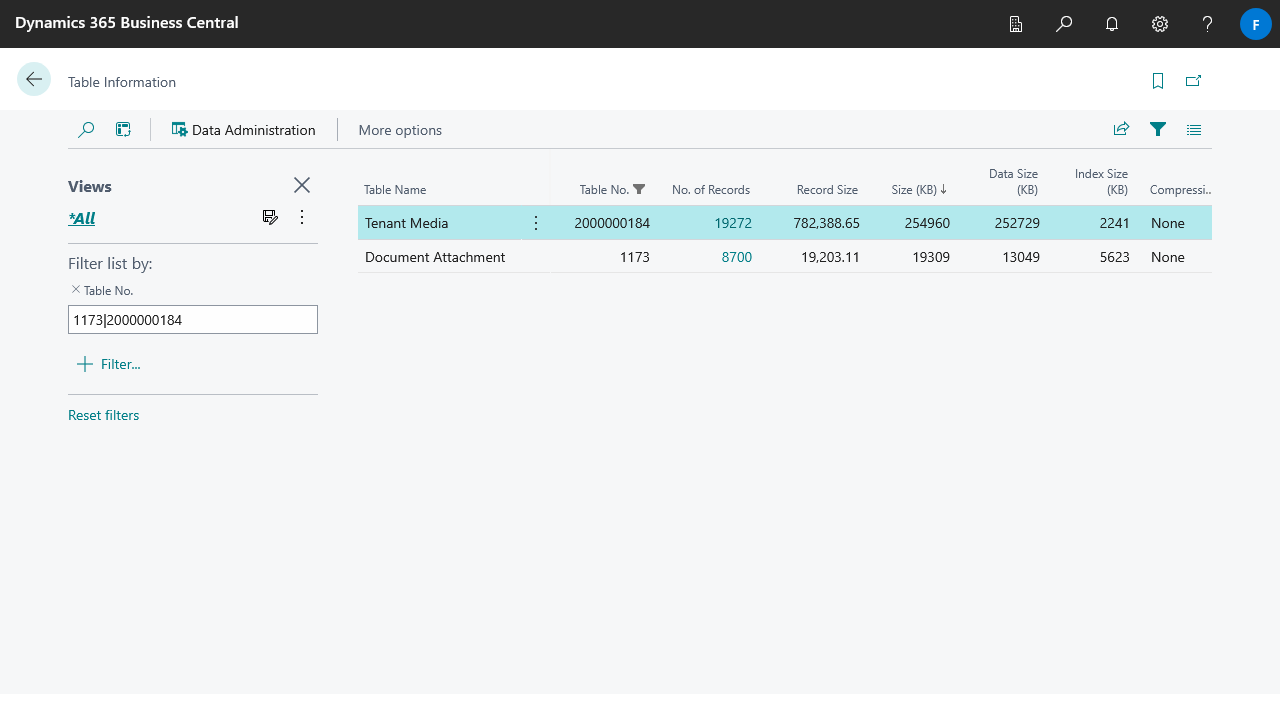
Analyze the impact of attachments in your system by navigating to the Table Information page, note down the No. of Records and Size of the following tables.
- The Tenant Media table (2000000184) stores all files and media in your system, including attachments. This shows you the size of your attachments in your database.
- The Document Attachment table (1173) shows you how many attachments you have. Drilling down on the “No. of Records” will let you see which records your files are attached to.
Posted documents are generally the source for most of your attachments, and are a good place to start with your migration.
2. Setup Attach-It Groups
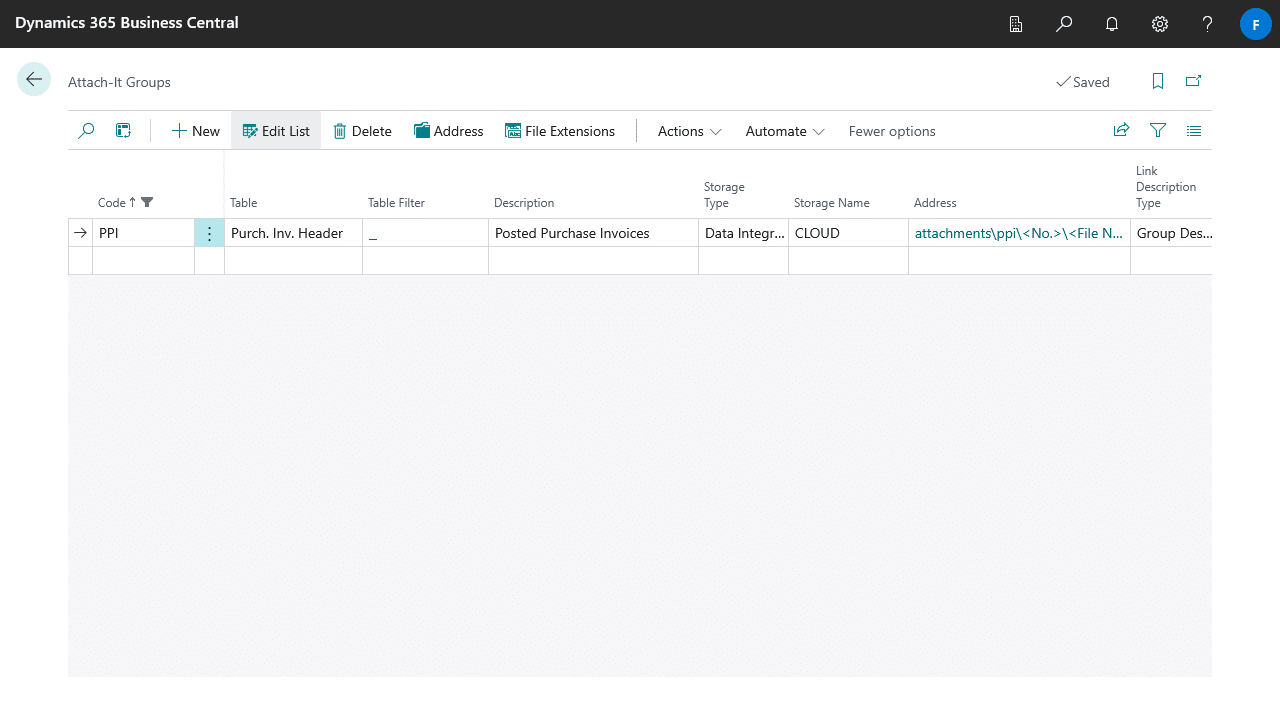
We recommend setting up one Attach-It Group for each table you are migrating, this helps you organize your files and avoid conflicts between files. Please follow the guide here on how to setup Attach-It Groups.
This is an example of an Attach-It Group for the Posted Purchase Invoice Header table.
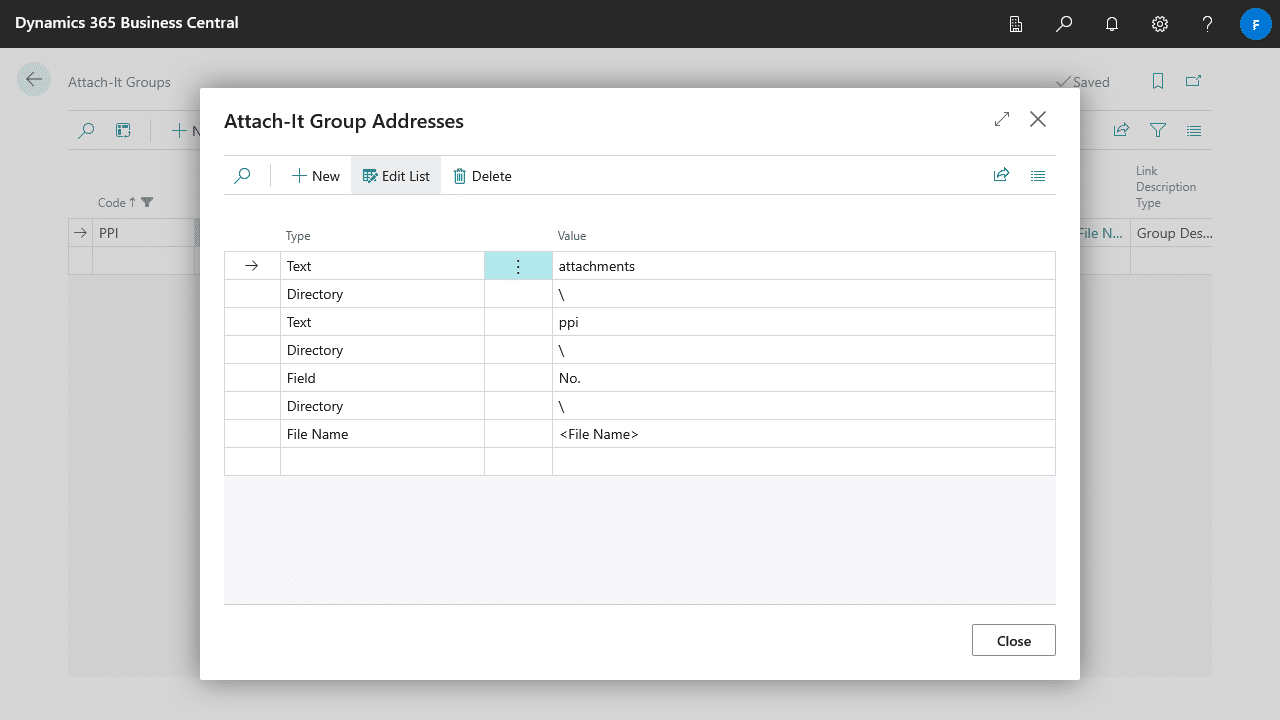
And this is an example of the Attach-It Group Address.
3. Creating the Job Queue
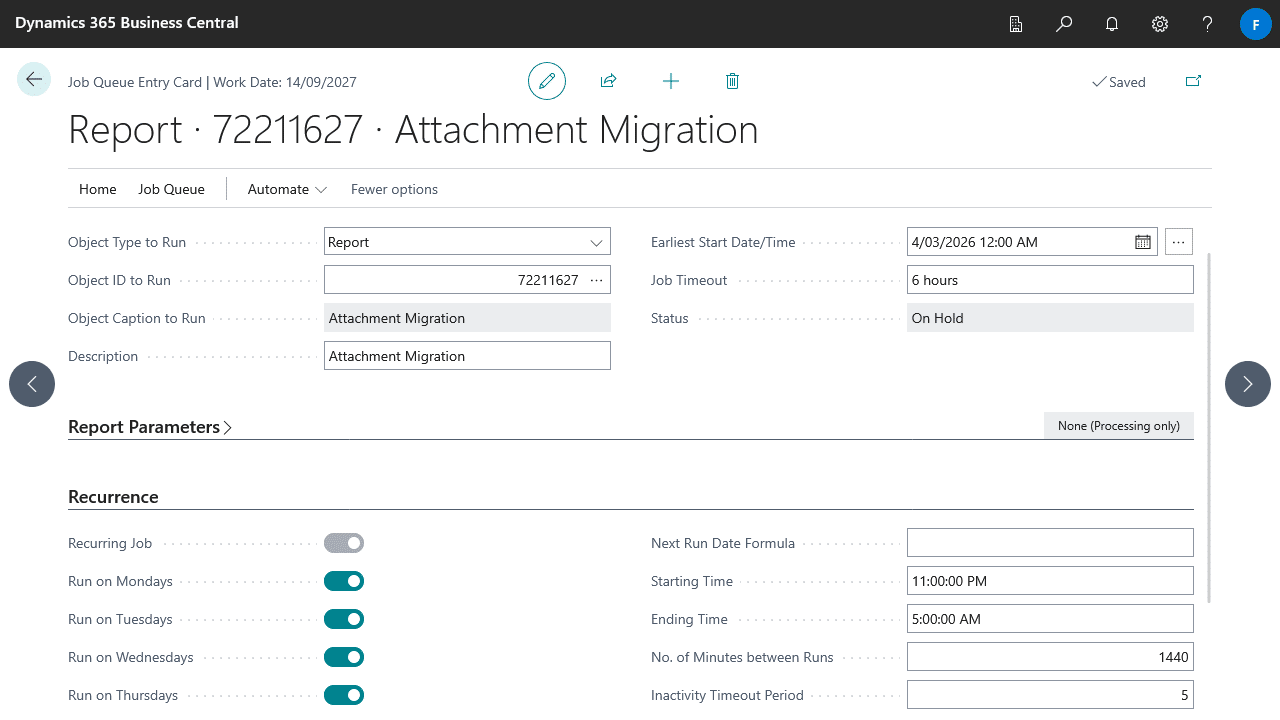
How long the migration takes depends on the amount and size of your attachments. For this reason it’s recommended to perform the migration in a Job Queue and schedule it to run outside of business hours, and let the Job Queue incrementally migrate attachments in batches. The job will automatically save its progress after each run so it can continue where it left off.
Navigation to the Job Queue Entries page and create a new Job Queue Entry, then setup the Job Queue for the report Attachments Migration 72211627. Below is an example of a migration job that runs every day between 11PM and 5AM, with a Job Timeout of 6 hours.
4. Testing the migration
It’s important to test the migration process first in small batches or in a sandbox environment as this process is not reversable.
The simplest way is to make a copy of your production environment, however this may not be possible if you are already constrained by your storage capacity limit. In such cases you can either create a blank sandbox environment, or perform controlled tests in your production environment.
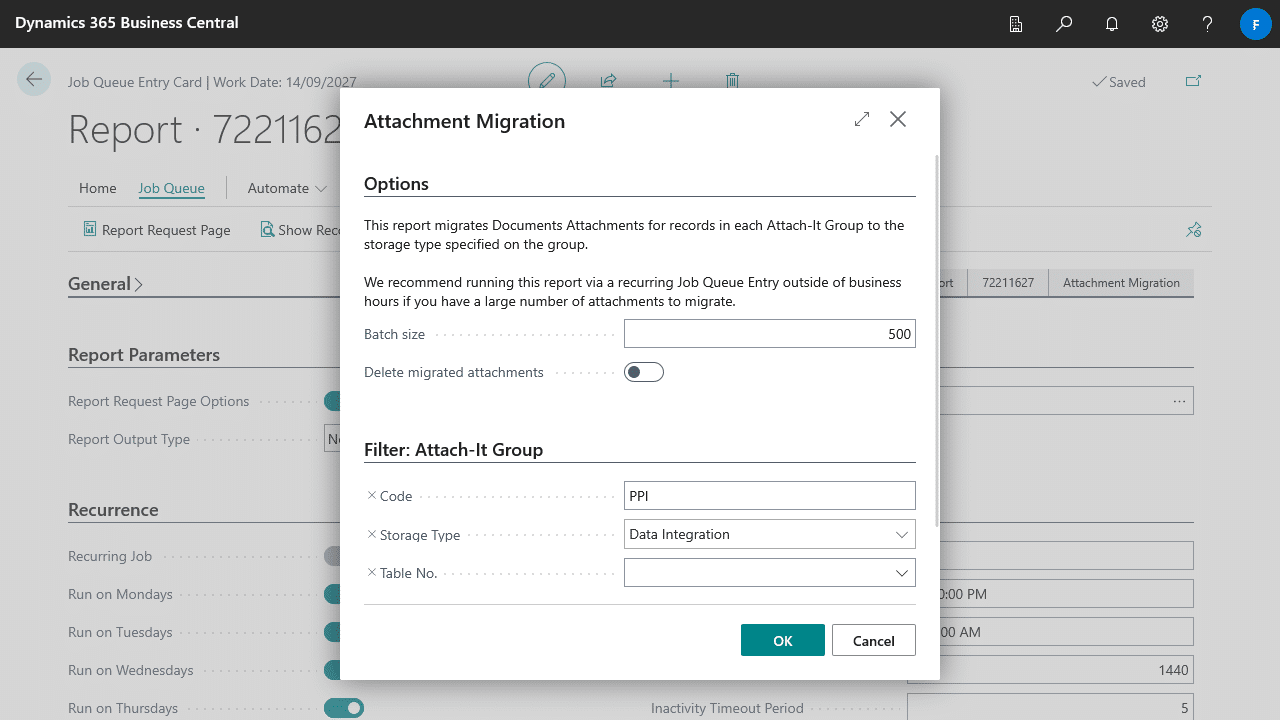
During migration you can limit which Attach-It Groups will be migrated, as well as choose to not delete the attachment in your database after they are migrated for testing purposes. To configure this, select the Report Report Page action on the Job Queue and apply the settings on the report request page.
5. Performing the migration
Simply set the Job Queue you created to Ready and it’ll run in the background migrating attachments out of Business Central.
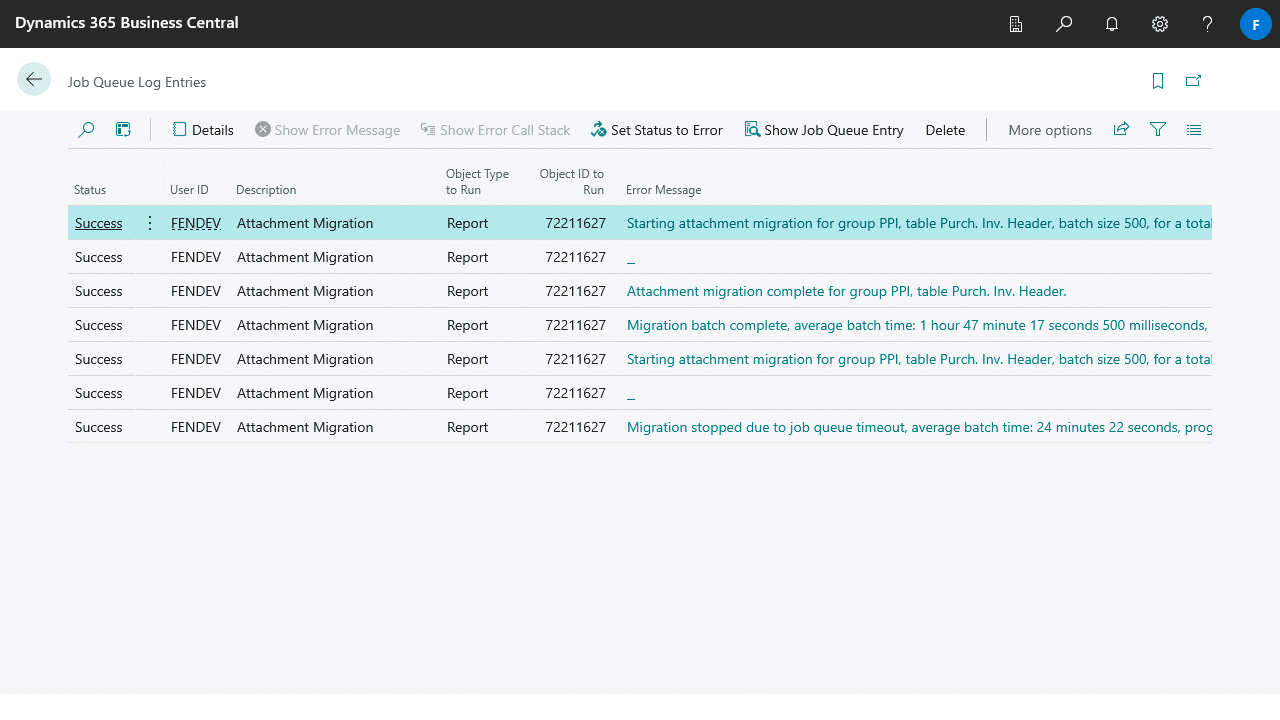
To monitor the progress of the migration open the Log Entries of the Job Queue. The migration will create logs for each batch of attachment it has processed, as well as any errors it encounters on the way.
6. Completing the migration
Once the migration process is complete, the logs will report that they are no more attachments to migrate, at which point you can remove the Job Queue. You can also check the Table Information page again and compare changes on the Tenant Media and Document Attachment tables.